Editing Default & Custom Fields
Editing Default Fields
Default fields can be added and edited manually in the Details panel on each contact's profile page. Default fields include a contact's name, groups and addresses. To find them, open a contact's profile page and look at the Details panel on the right side.
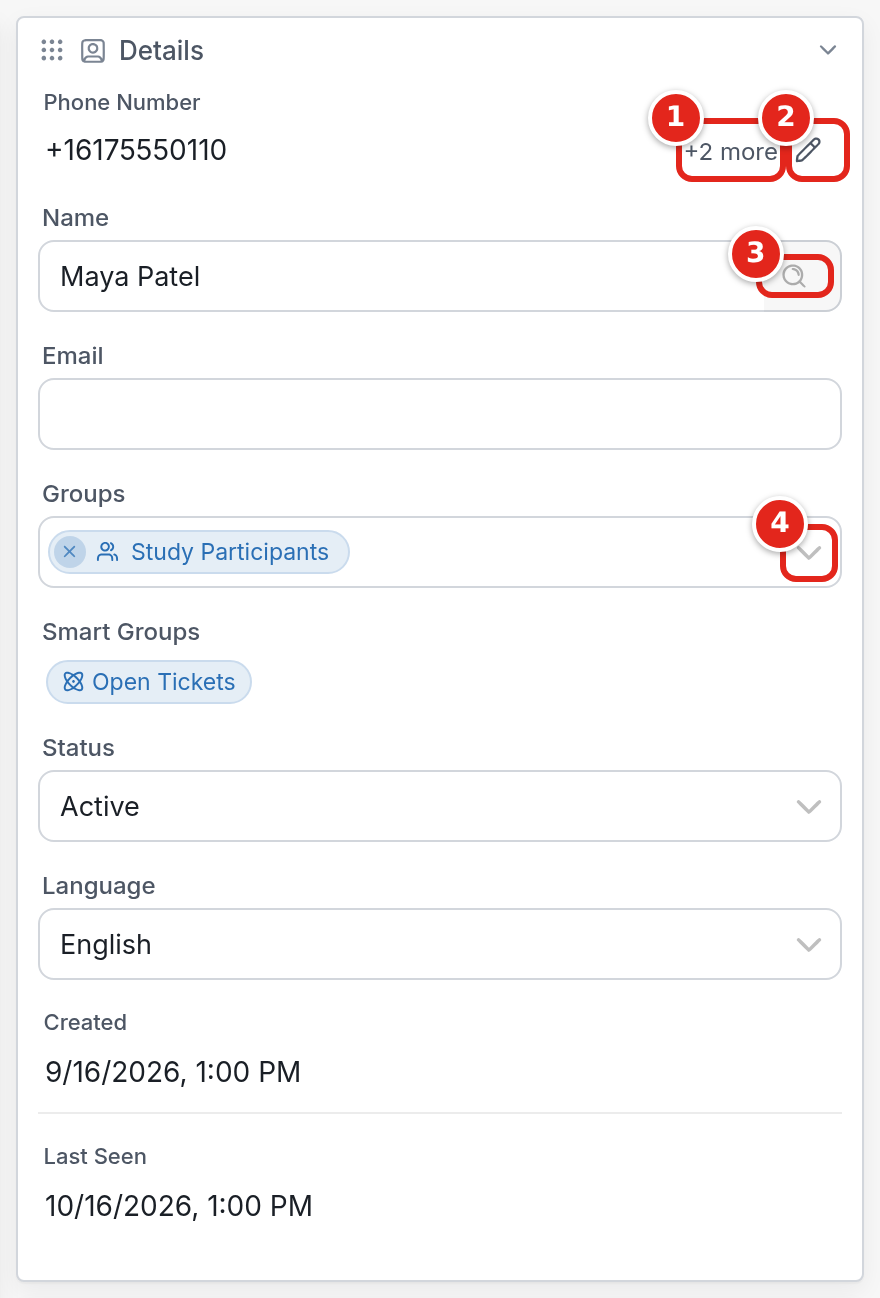
- +2 more shows how many other addresses the contact has besides the one displayed.
- Click the pencil icon to the right of the address to open the Edit URNs dialog, where you can add, remove and prioritize the contact's addresses. The topmost address is the priority address, which determines how outbound messages reach the contact. For example, say your workspace has Phone Number and WhatsApp channels connected and you send a message to three contacts, each with a different address priority. Each contact receives the message through the channel that matches their priority address.
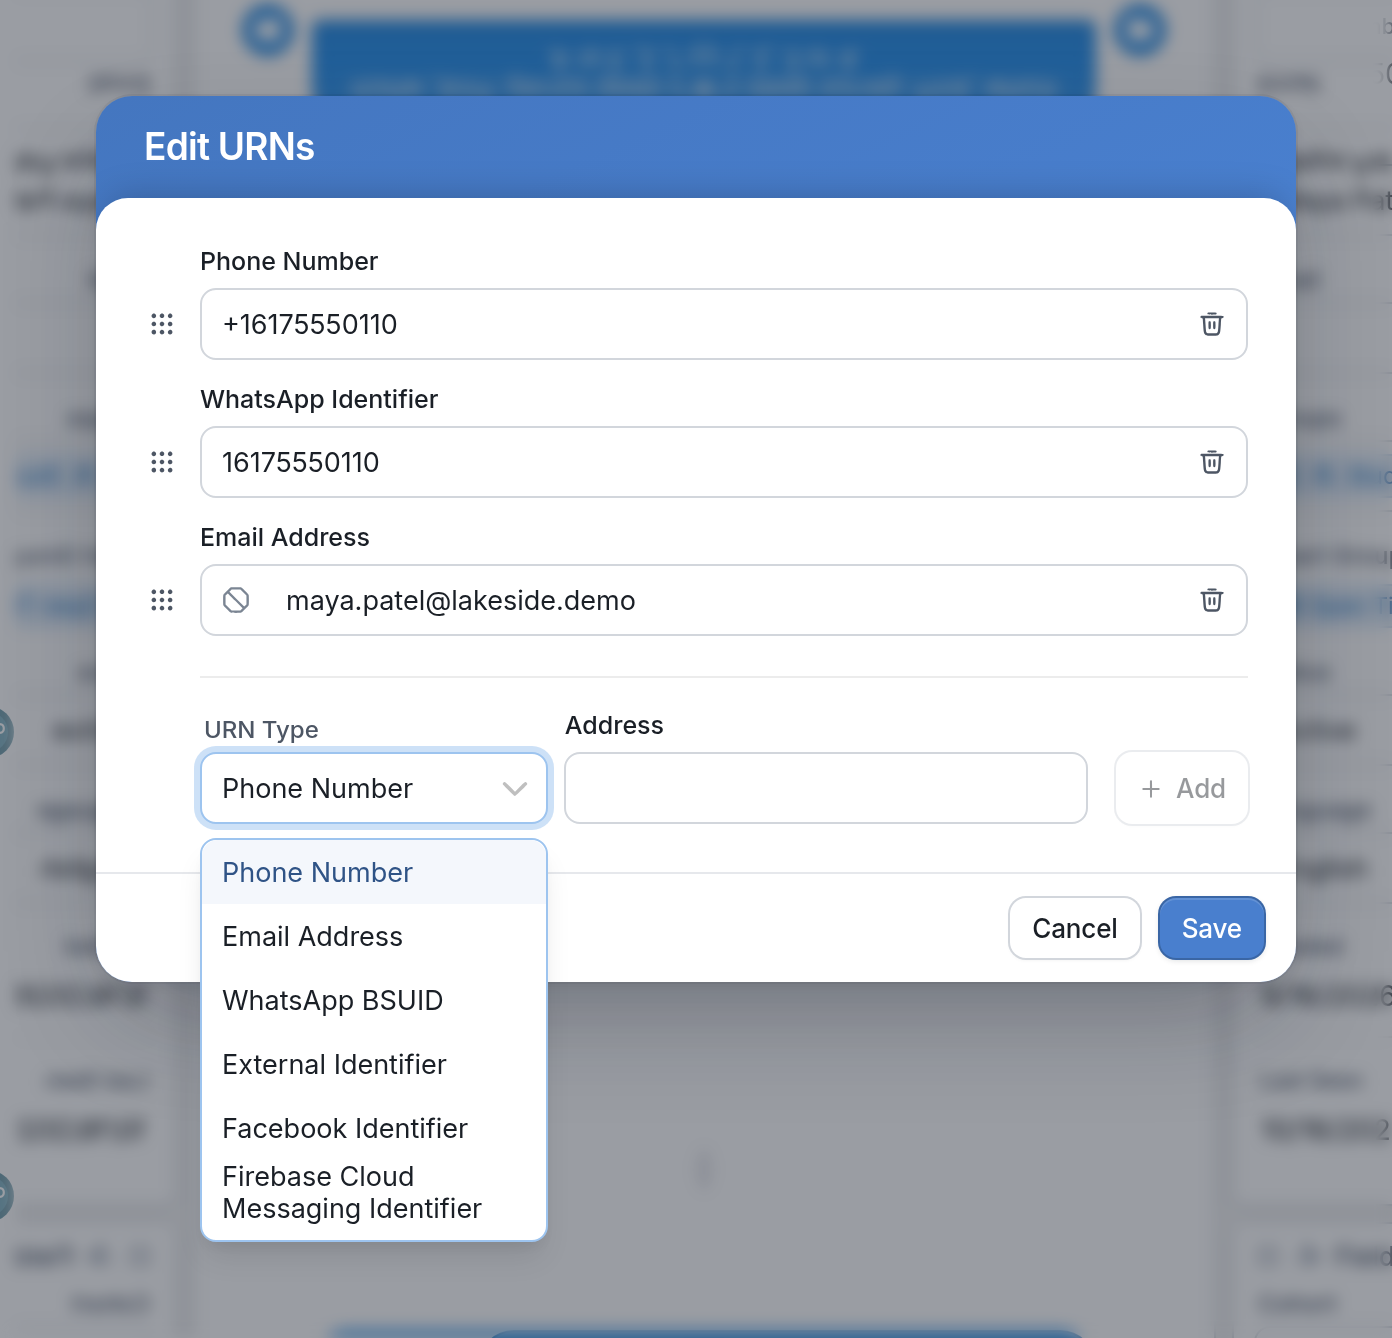
You can change the value of a contact field from the Contacts tab, or by adding the Update the contact action to a flow. When a new address sends a message to a channel connected to your workspace, a new contact is created with an empty name and empty values for each custom contact field you've added. Until those values are updated, the contact can only be identified by their address.
- Change the contact's name.
- Add the contact to any group.
Editing Custom Fields
Custom fields can be edited from a flow with the Update the contact action. See more here.
To edit a single contact's custom fields, edit the featured fields directly in the Fields panel on their profile page.
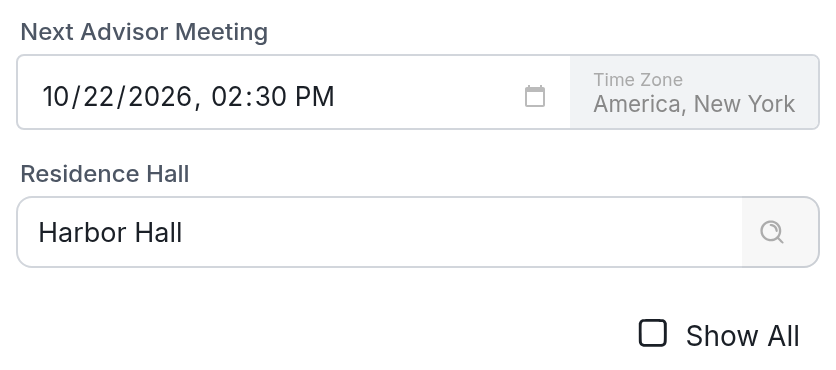
- Replace the old value with the new one and click Save.
- Check Show All to see every other custom contact field in your workspace.
Editing Date Values
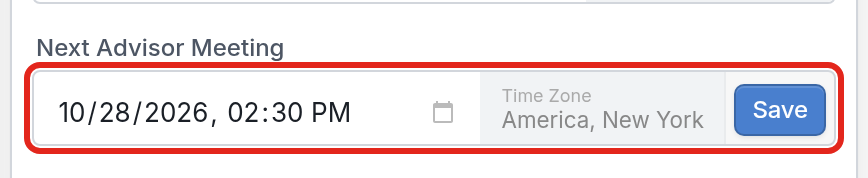
To change a date field such as Next Advisor Meeting, pick or type a new date and time, then click Save.
| When you manually add a date value to a contact field without specifying a time, the time is set to the time at which you updated the field. |
Using a Flow
Contact fields can also be created and edited with a flow that contains an Update the contact action. See our guide here.
Using a Contact Import
Contacts can be imported with multiple address types, but only one address of each type.

You can update a contact's field values by including the contact field and its value in your import. Contact addresses, a type of default field value, can be added but not replaced through an import, as long as the UUID column contains the UUIDs of the contacts. You can get contact UUIDs by exporting your contacts. The export includes all of the information associated with your contacts, including their UUIDs.
Replacing Addresses
At this time, contact addresses can only be replaced through the Contacts API Endpoint or on a contact's profile page, as described above.