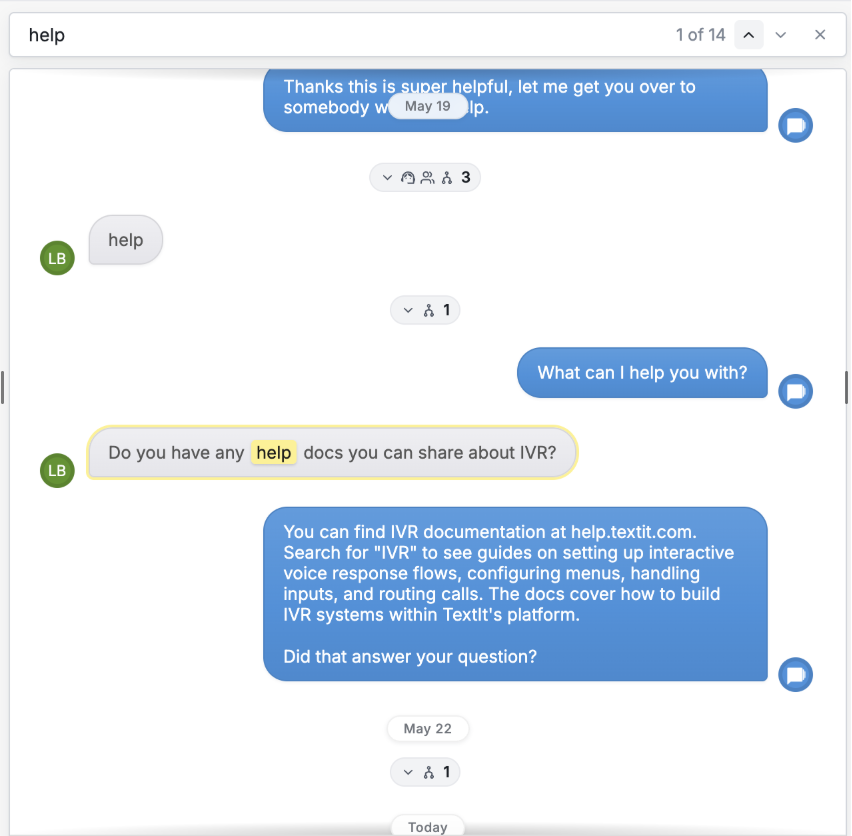
Navigating the Contact Page
The Contact Page lets you view and manage all information related to an individual contact — from updating contact details to reviewing conversation history, including events. This makes it easy to quickly understand a contact's history and continue interactions without switching between multiple screens.
Editing Contact Information
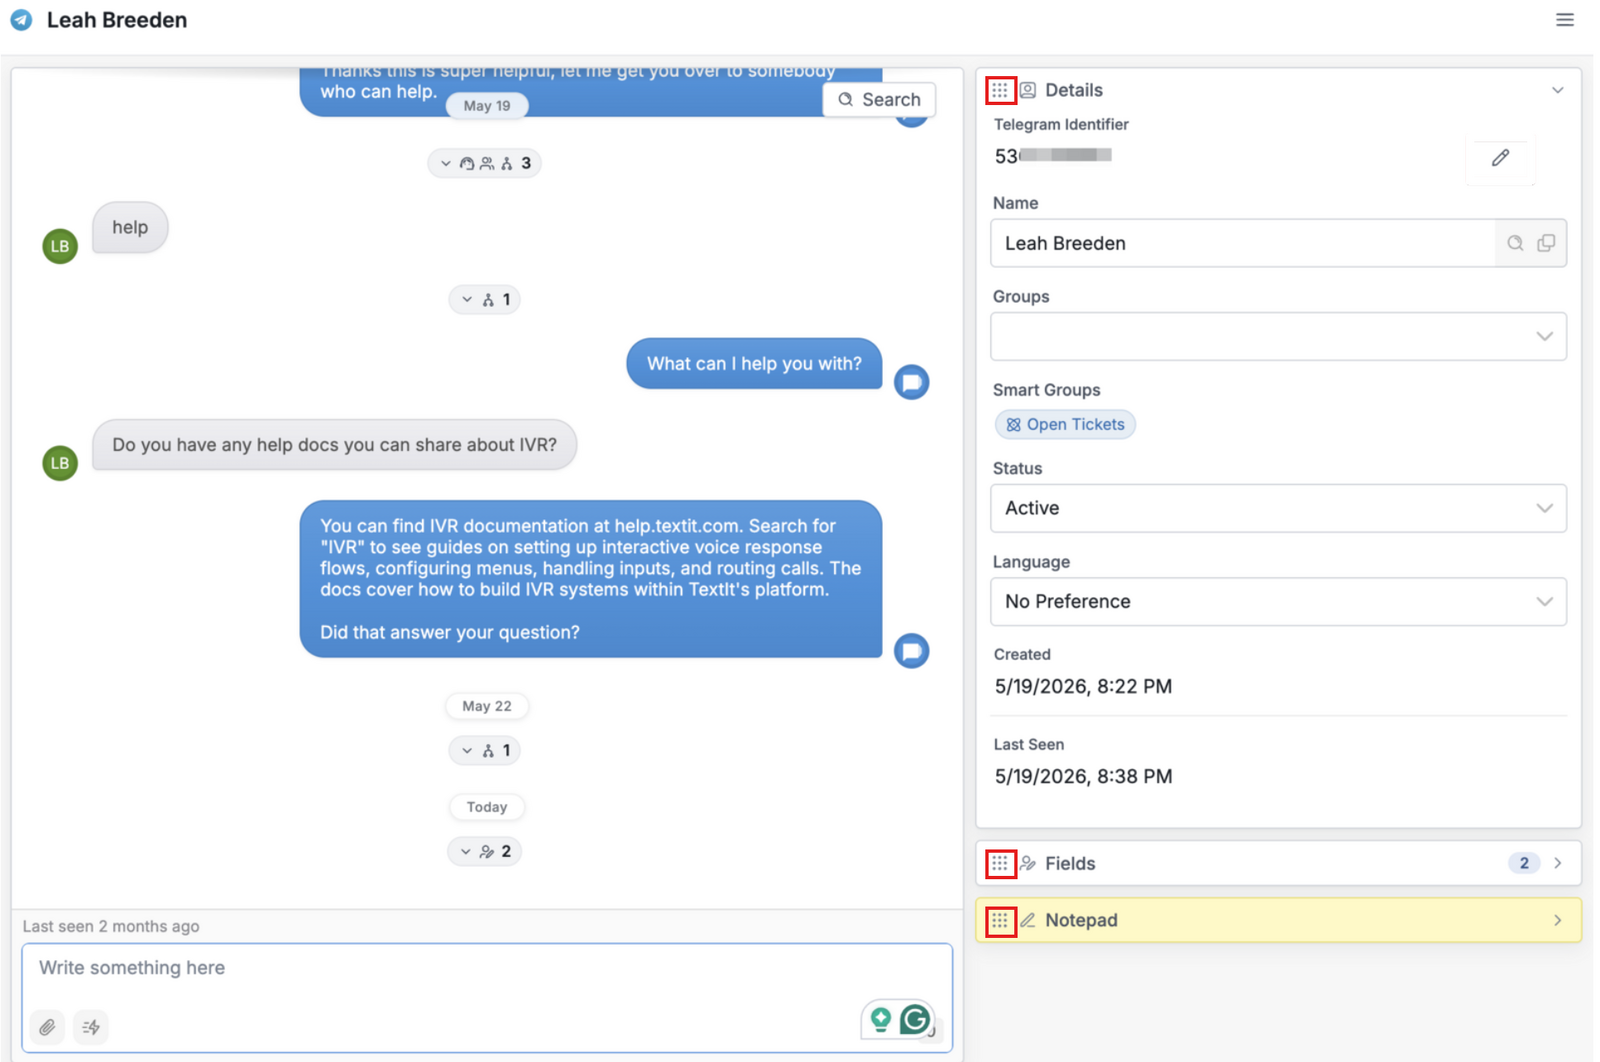
You can edit contact details (Name, URN, fields, status, language, group membership, and Notepad) directly from the right-hand side of the contact's page.
Click on the> icon to expand or collapse each section.
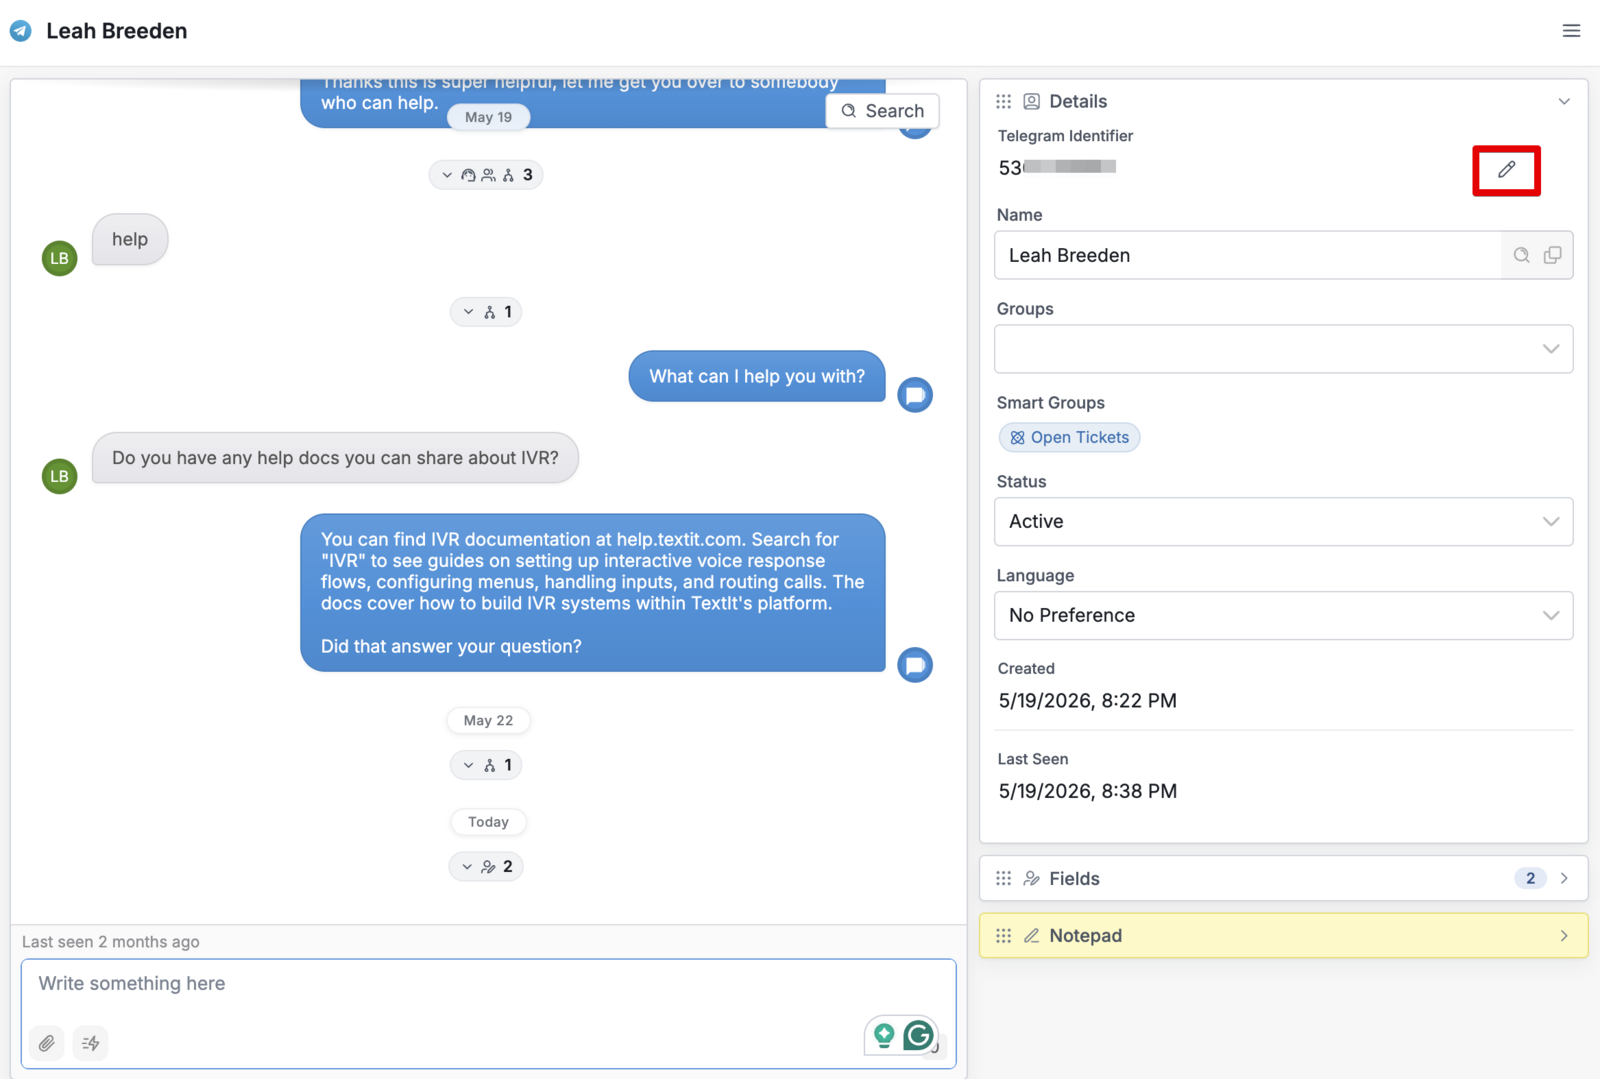
Contact Details
You can add a contact's phone number, email and other channel IDs by clicking the pen icon, entering the details, and clicking Save. The updated information is immediately reflected in the contact profile.
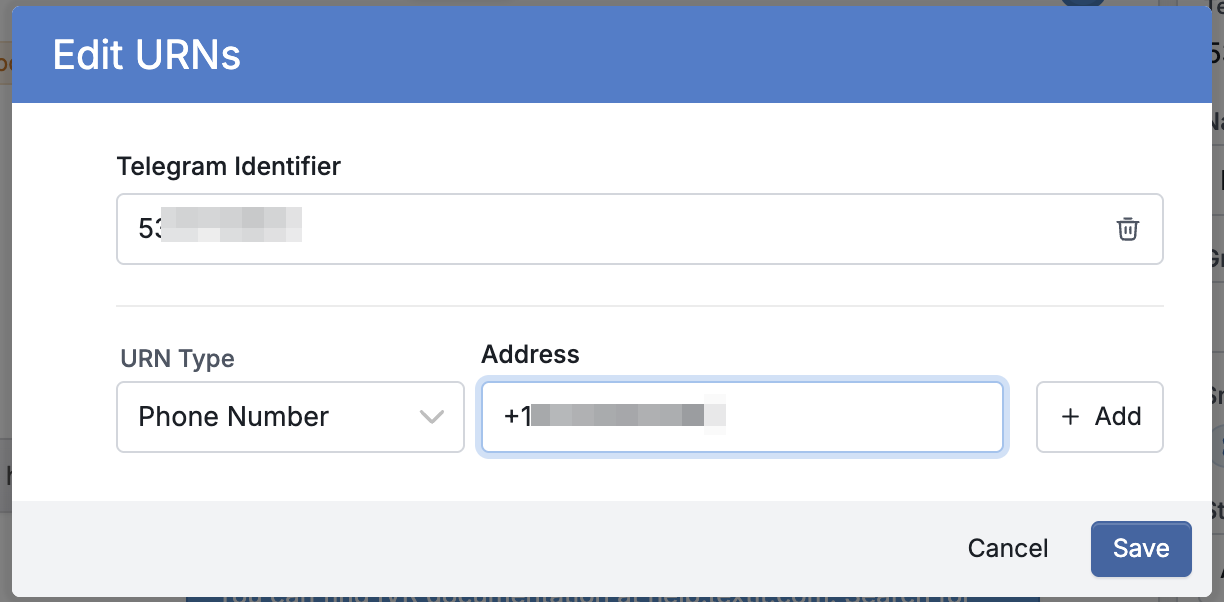
The same applies when updating names. Additionally, you can manually select a language, status or group to add the contact to. Make sure to click 'Save' to update the new information.
Fields
To update any custom contact fields, expand the fields window to reveal your 'featured' contact fields, then click Show all to see all other custom fields.
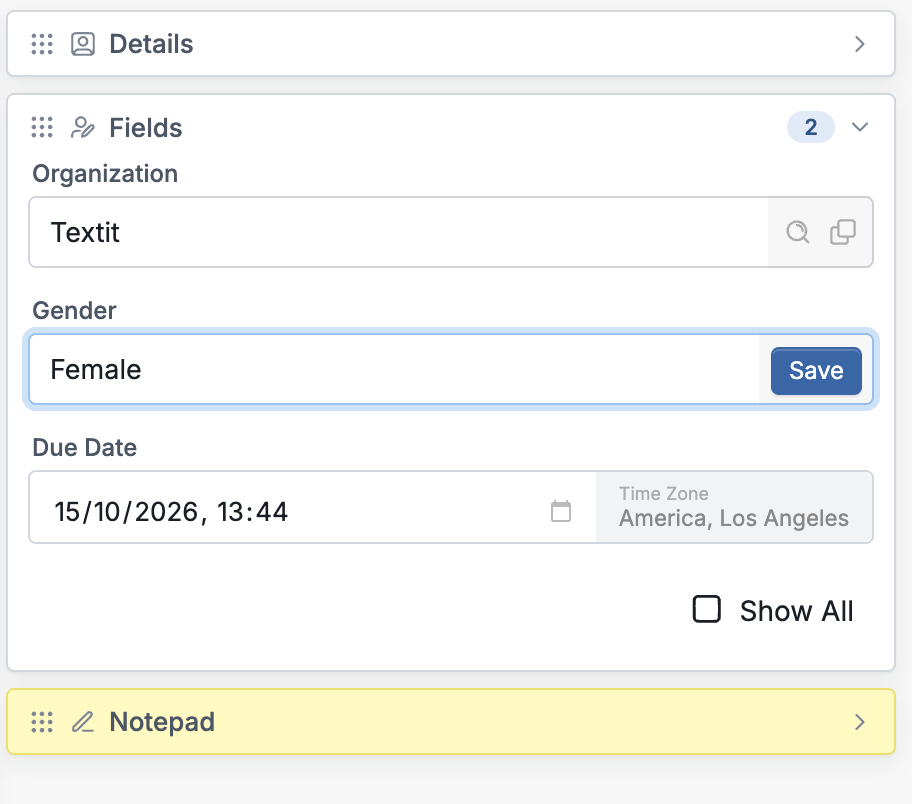
Type in the new information and click Save.
Notepad
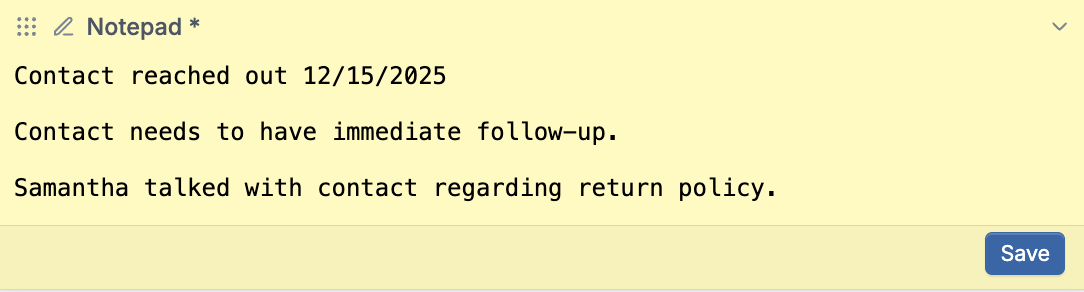
Add any internal notes you'd like colleagues to see when they review the contact's page. Agents don't have access to a contact's full profile, but they can use the notepad to view and add updates that other users can see. See more here.
Viewing Event Details
Event details — like a flow being started, completed, or interrupted, a ticket being opened, and more — are collapsed into the pill icons you see in the chat history.
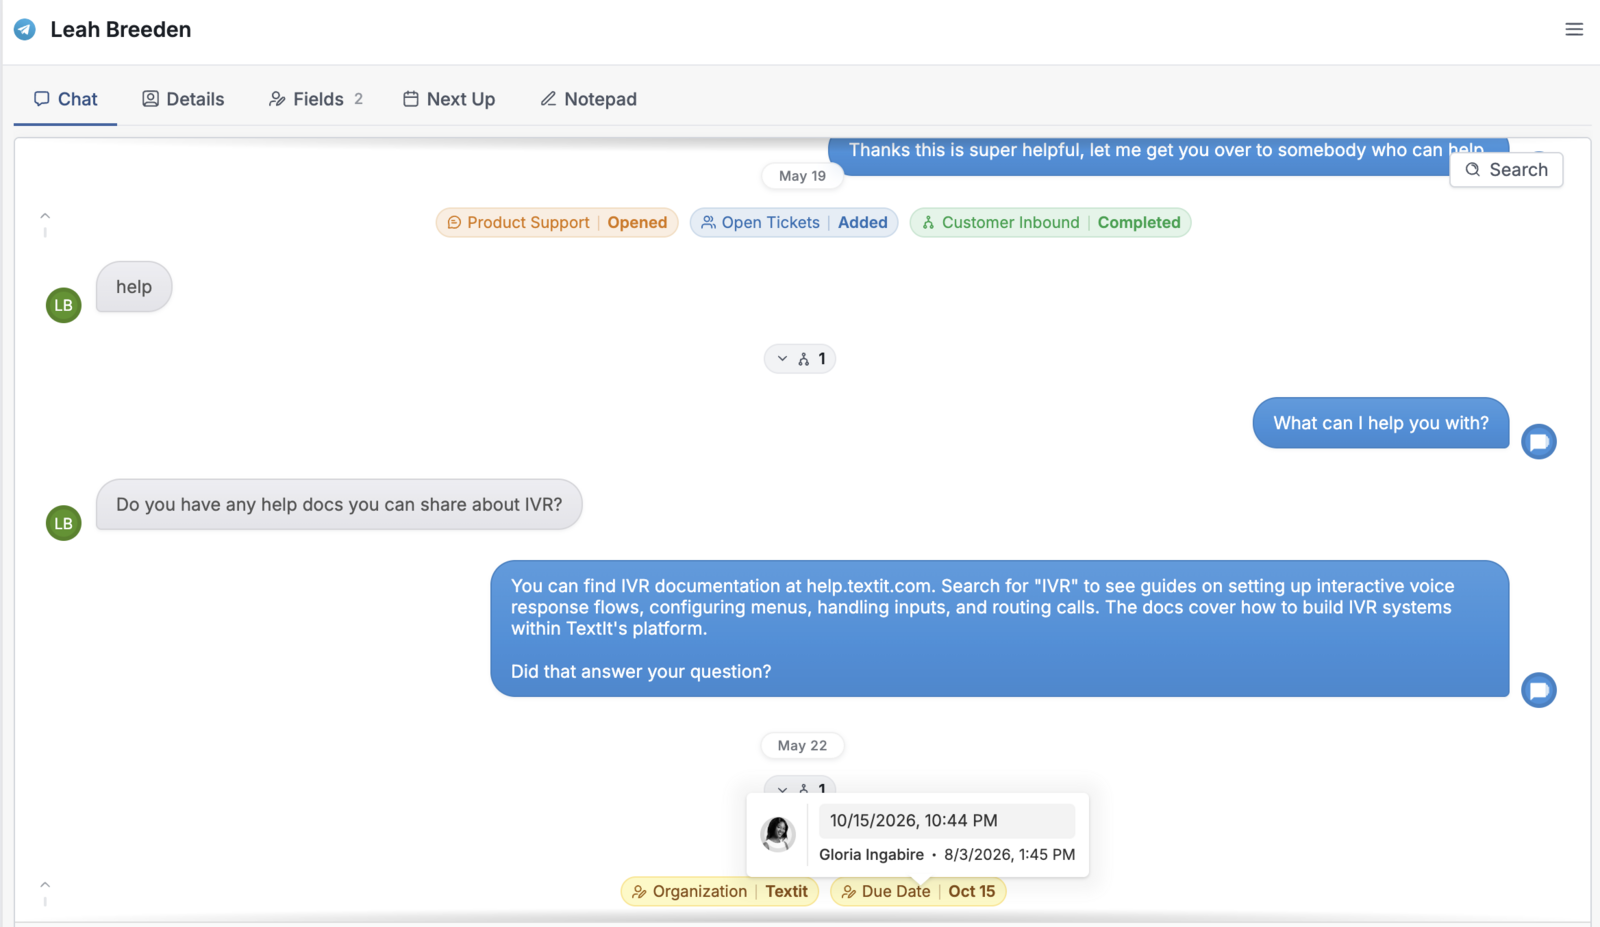
If an event was manually executed, hover over the event to see who made the change and when. In the example above, the user Gloria Ingabire updated the contact's due date field to 10/15/2026, on 8/3/2026 at 1:45pm.
Next Up
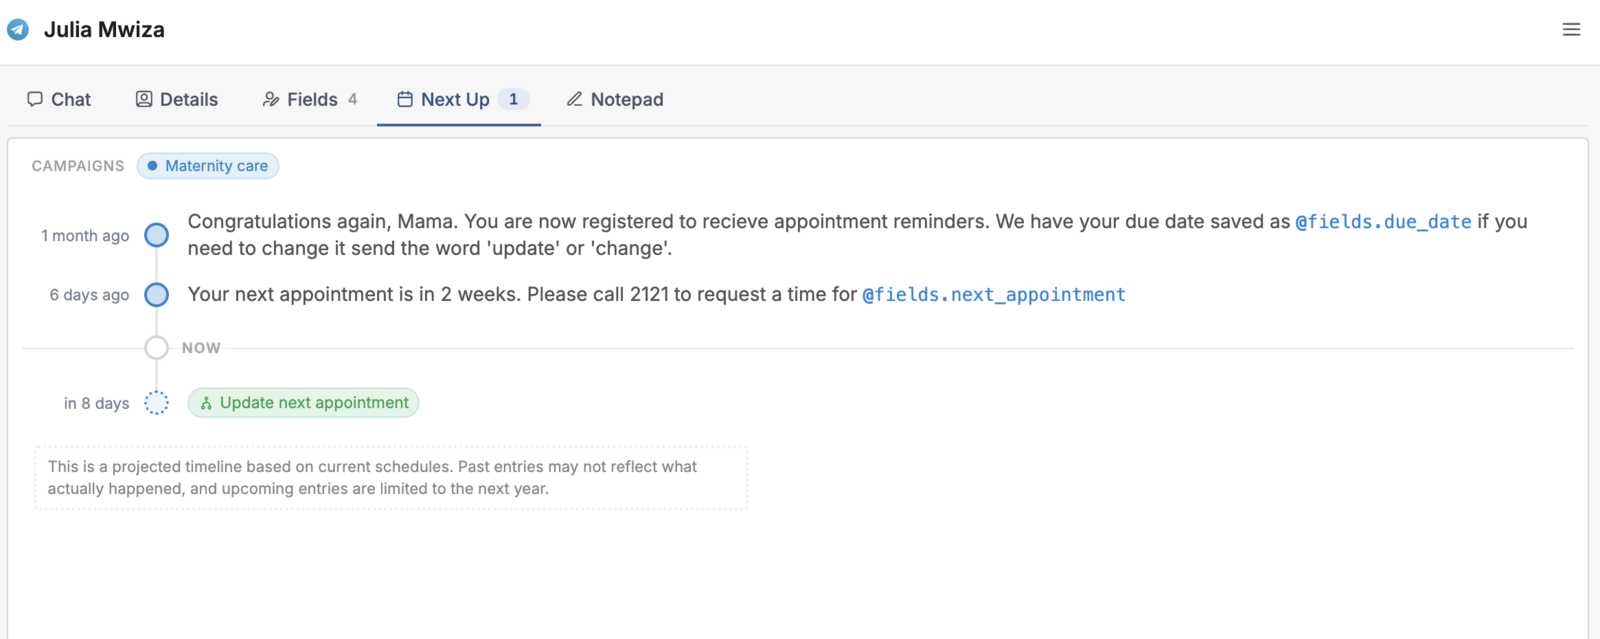
The Next Up tab shows any upcoming events scheduled for a contact, such as a campaign event or broadcast message. This tab only appears when the contact has at least one upcoming or scheduled event. If there are no scheduled events for the contact, the Next Up tab will not be displayed.
Manually Launch a Flow
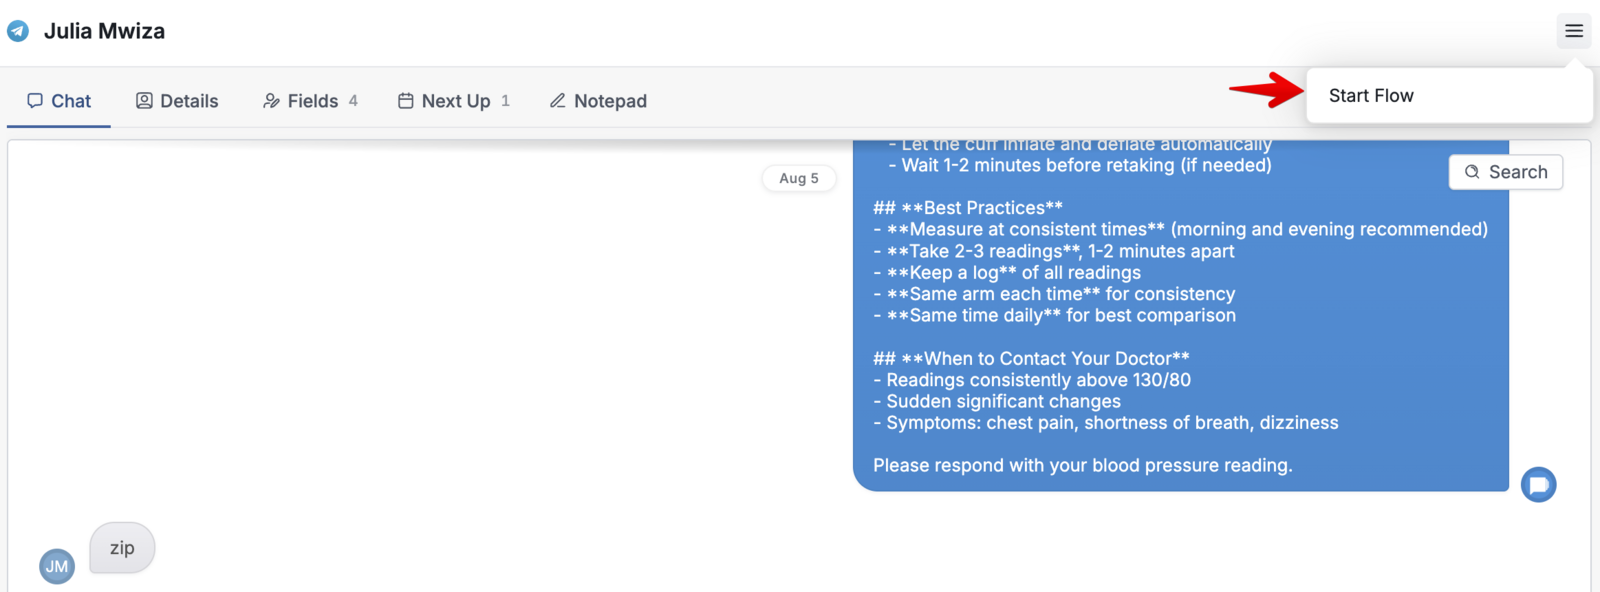
From the menu icon in the top-right corner of the contact's page, select the flow you'd like to start the contact in. If the contact is already in a flow, this button won't appear.
Resizable Chat Window
The chat window can be resized to fit your preferred working style. Simply drag the edge of the conversation panel to make it larger or smaller depending on what you're working on. Drag the conversation panel all the way to the right of the page to see it in full window (classic) view with contact tabs separated. Drag the panel back to the left to return to side by side view.
Customize your Contact page layout by using the drag handle to the left of each section to drag it into the order you prefer.
Searching the Chat History
Instead of scrolling through hundreds of messages, use the search button of the conversation to find a specific word or phrase.