Configuring a Webhook with Airtable
Airtable lets you build and organize databases for almost any project. The basic Airtable lets you build and organize databases for almost any project. The basic version is free to use and allows real-time collaboration with team members.
In the example below, we use the Call Webhook action in a flow to look up a student's PID and university email by their full name, as stored in an Airtable database that we've created.
Build your Airtable database
To pull data into your flow with a webhook, you'll first need to create an Airtable account and build your database.
Below is our simple student lookup database, which includes fields (equivalent to spreadsheet columns) for each student's name, PID and university email.

Create a personal access token in Airtable
TextIt needs permission to read your Airtable data. Airtable now uses personal access tokens for this. Its old API keys stopped working on February 1, 2024, so if your flow still uses one, replace it with a token.
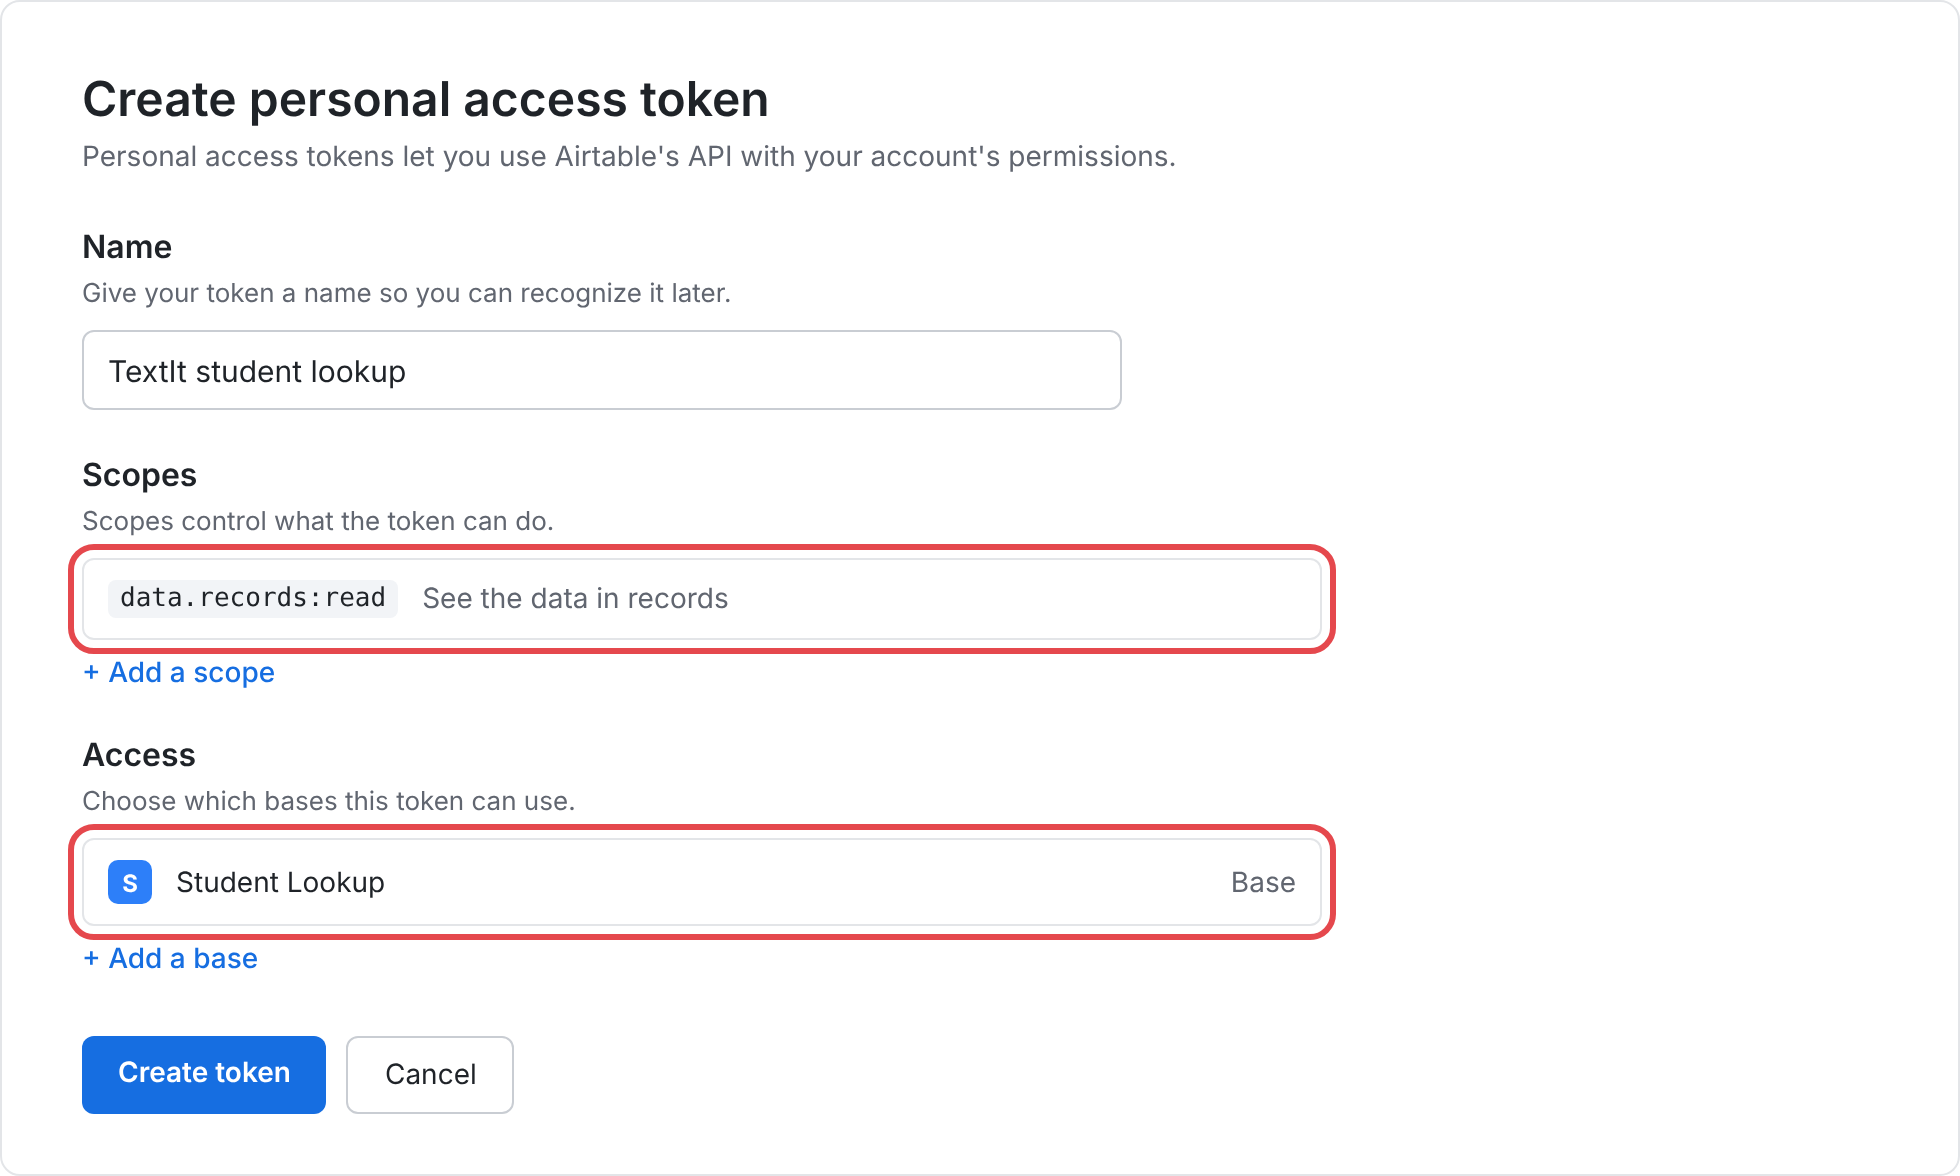
- Go to airtable.com/create/tokens and click Create token.
- Give the token a name you'll recognize, such as TextIt student lookup.
- Click + Add a scope and choose data.records:read. This lets the token read records. If your flow also creates or updates records, add data.records:write as well.
- Under Access, click + Add a base and choose only the base your flow uses. In our example, that's Student Lookup.
- Click Create token, then copy the token and keep it somewhere safe. Treat it like a password: anyone with it can read the bases you gave it access to
Store the token in a global
We recommend saving the token as a global rather than pasting it into each webhook. That way it stays out of your flow definitions and you only need to update it in one place.
Go to your Flows page and click Globals in the menu on the left, then click New. Name the global Airtable Token, which you'll reference in flows as @globals.airtable_token. For its value, type Bearer, a space, and then paste your token (for example, Bearer patXXXX…). Click Create..
Build your Flow
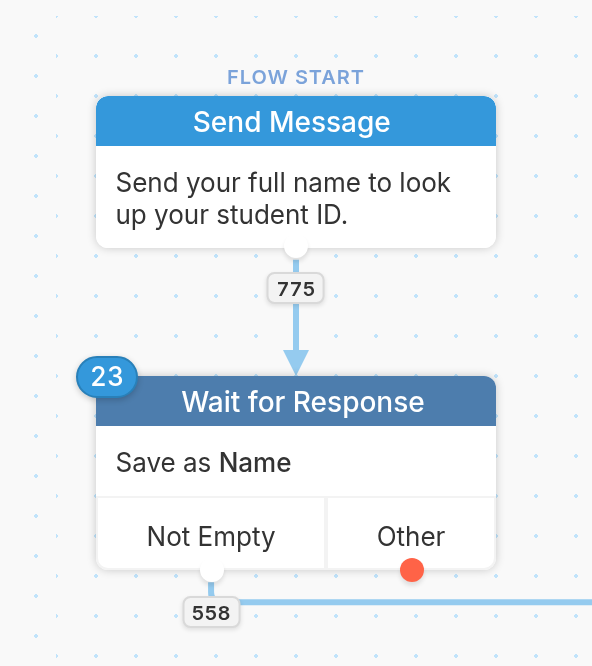
Once your database, token and global are set up, you're ready to build your flow. In our example below, we first ask the contact to send their full name so we can look up their PID. We then use the Call Webhook action to send a request to Airtable and pull in the data from our database.
| Note lookups in Airtable are case-sensitive. To ignore capitalization, see the tips under Configuring your URL. |
Setting up your Call Webhook Action
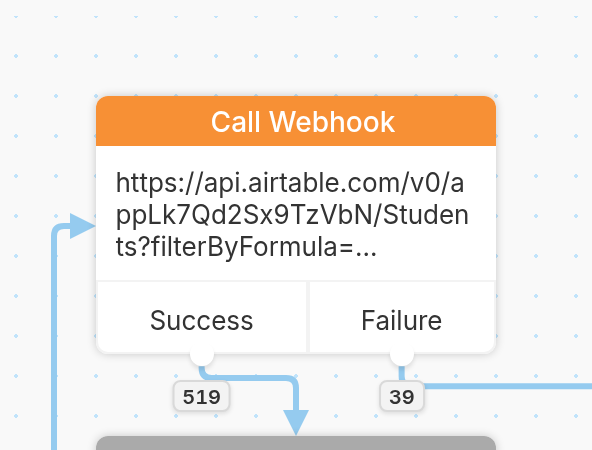
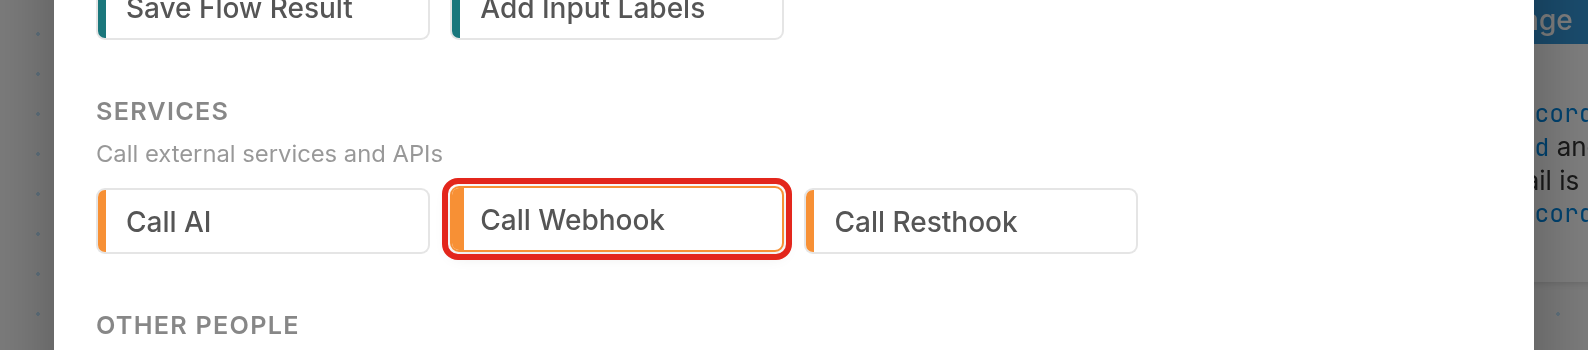
First, add a Call Webhook action:
Next, choose GET, enter your URL (see Configuring your URL below), and add a header named Authorization with the value @globals.airtable_token.
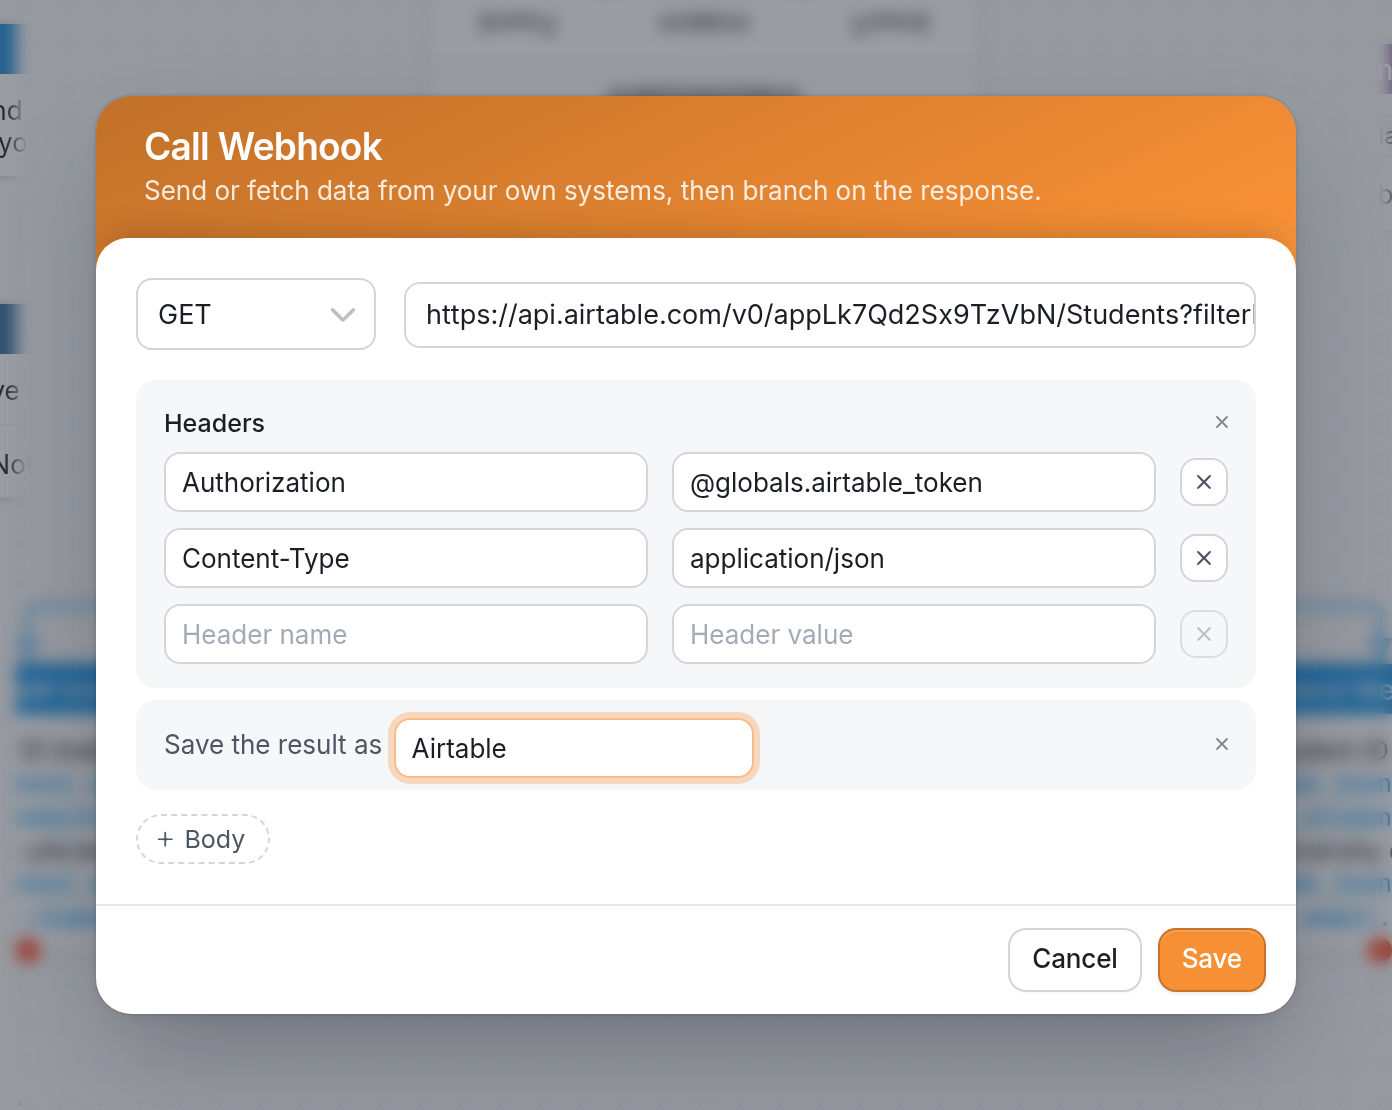
Because the global already contains "Bearer" and your token, this is all the header needs. If you didn't use a global, enter Bearer, a space, and then your token as the header value.
Configuring your URL
The URL tells Airtable which table to search and what to look for. Here's the one from our example:
https://api.airtable.com/v0/appLk7Qd2Sx9TzVbN/Students?filterByFormula=Name%3D%22@results.name%22
To use it with your own base, replace these four parts:
| In our example | What it is | Replace with |
|---|---|---|
| appLk7Qd2Sx9TzVbN | Base ID | The part of your base's web address that starts with app |
| Students | Table | Your table's name |
| Name | Column to search | Your column's name |
| @results.name | The contact's answer | The result you saved in your flow |
Leave the rest as it is. %3D and %22 are the = sign and quotation marks written in a form web addresses accept, and the @ must stay as it is so TextIt can fill in the contact's answer.
| Tips: To ignore capitalization, so "leah" also matches "Leah", use filterByFormula=LOWER(%7BName%7D)%3DLOWER(%22@results.name%22) instead. To get back only one record, add &maxRecords=1 to the end of the URL. |
|
|---|---|
Evaluating External Variables
Once you've configured your webhook, you can use the @webhook.json.records variable in your flow, which references the values returned from an external application via a webhook.
To check what your Airtable database returned, create a Split by Expression action that evaluates one of the returned values against a rule.
Here's our Split by Expression action for our Student ID Lookup flow:
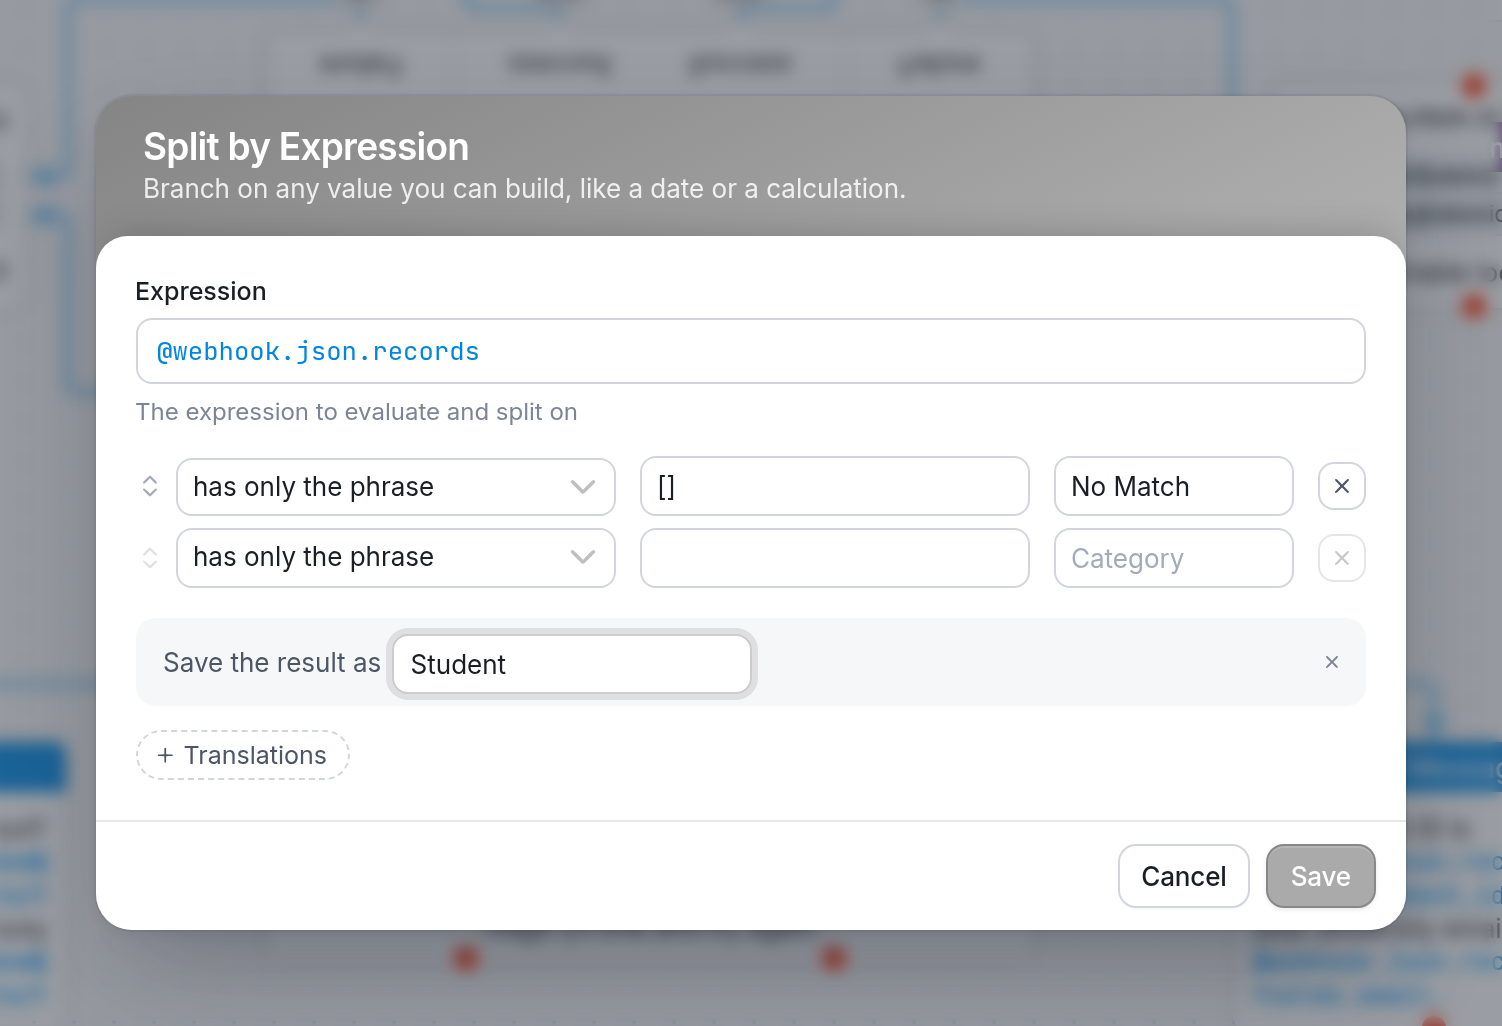
Split by Expression Inputs
Expression - We used @webhook.json.records because "records" is the key Airtable uses for what is essentially a row in our database. You can see the keys for your own database by viewing your webhook events as detailed here.
Rule - The rule has only the phrase works best for this use case.
Value - The value your rule tries to match against the expression. In this example, we've used [], which means no matching data was found in our Airtable database.
Category - The category contacts are placed in if the expression matches the rule. Categories are the paths you draw connections from to new nodes, directing the contact onward. Here, the category is No Match: because no matching data was found, we want to tell the contact that we couldn't find a student with that name. Any other result goes to the Found category, and the result is saved as Student.
The final piece of the flow is to send contacts a message with their student PID and university email:
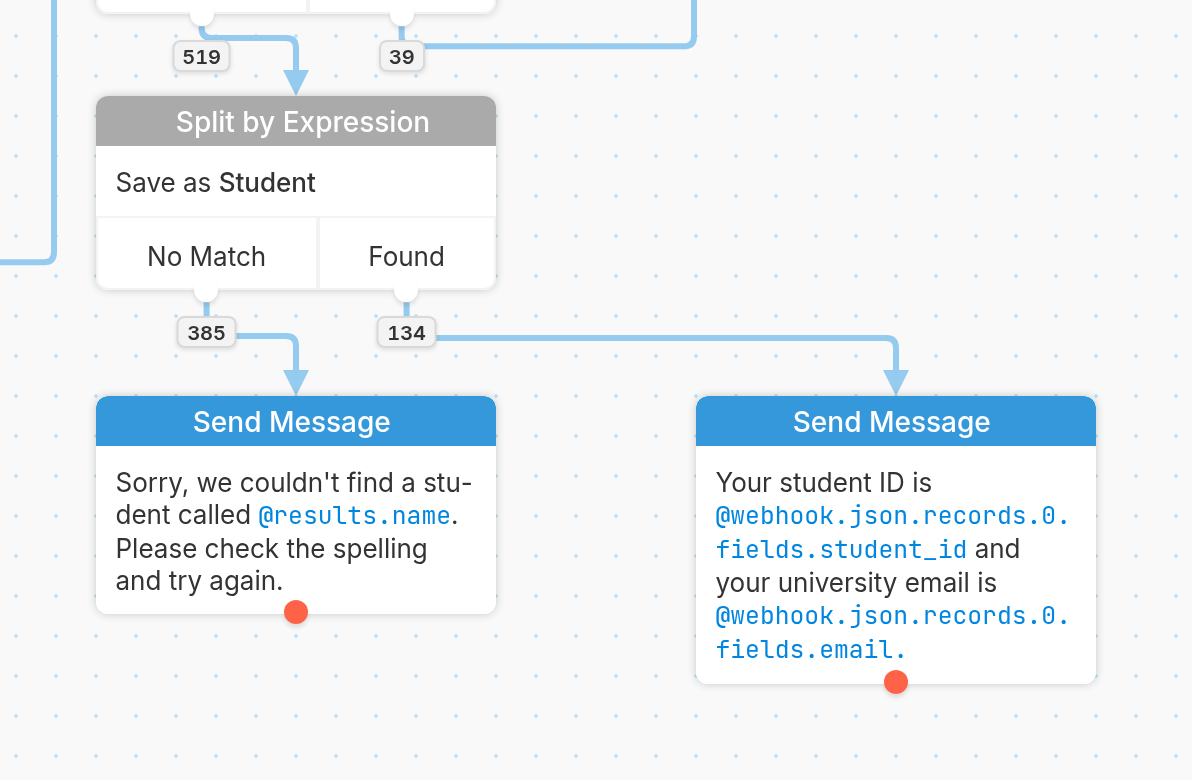
In our example, we used @webhook.json.records.0.fields.student_pid to reference the student's PID and @webhook.json.records.0.fields.email to reference their university email. Remember that fields are the same as columns in a spreadsheet, so use the column names from your Airtable base.

Here is our final result:
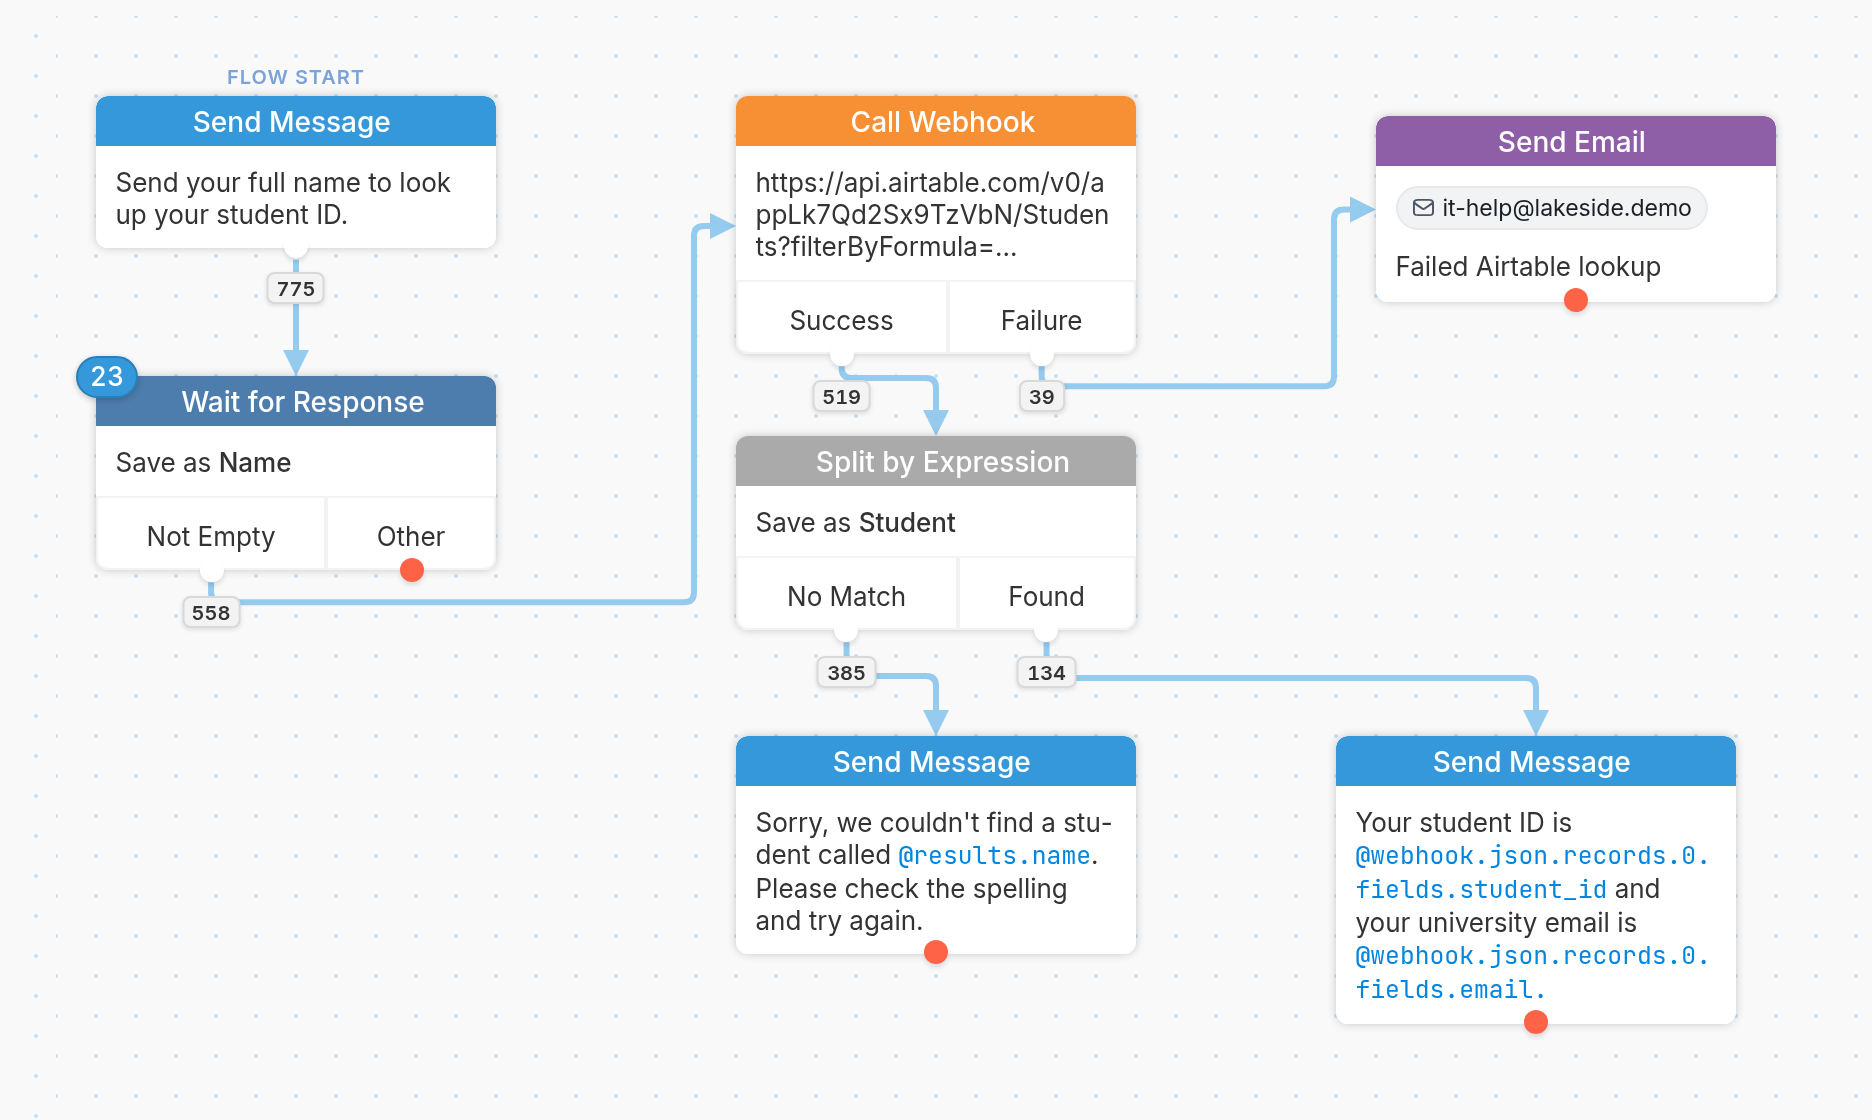
For more detailed information about configuring and testing your webhook, viewing webhook events and troubleshooting, click here. If you have any questions, send us a message via the support widget in the bottom right-hand corner.