Introduction to Flows
A flow is a visual representation of conditional branch logic that's applied to your contacts once they enter it. Once a contact has entered a flow, they interact directly with its nodes. Nodes are made up of actions and Split Actions, and they determine the length of a flow, which can be as short as a single node or as long as you want.
A blank flow editor:
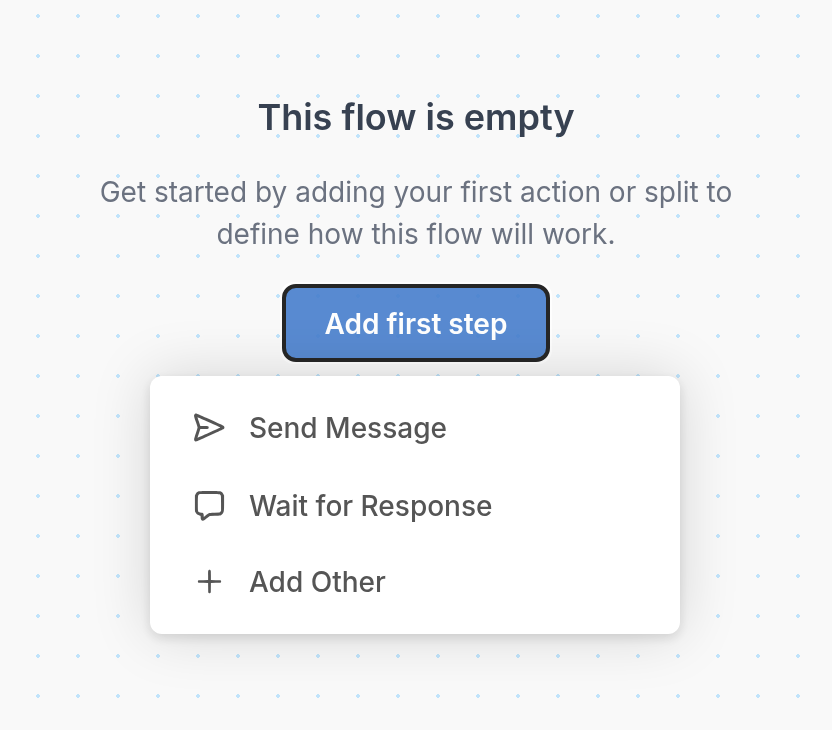
Click Add first step to choose your first action.
Actions
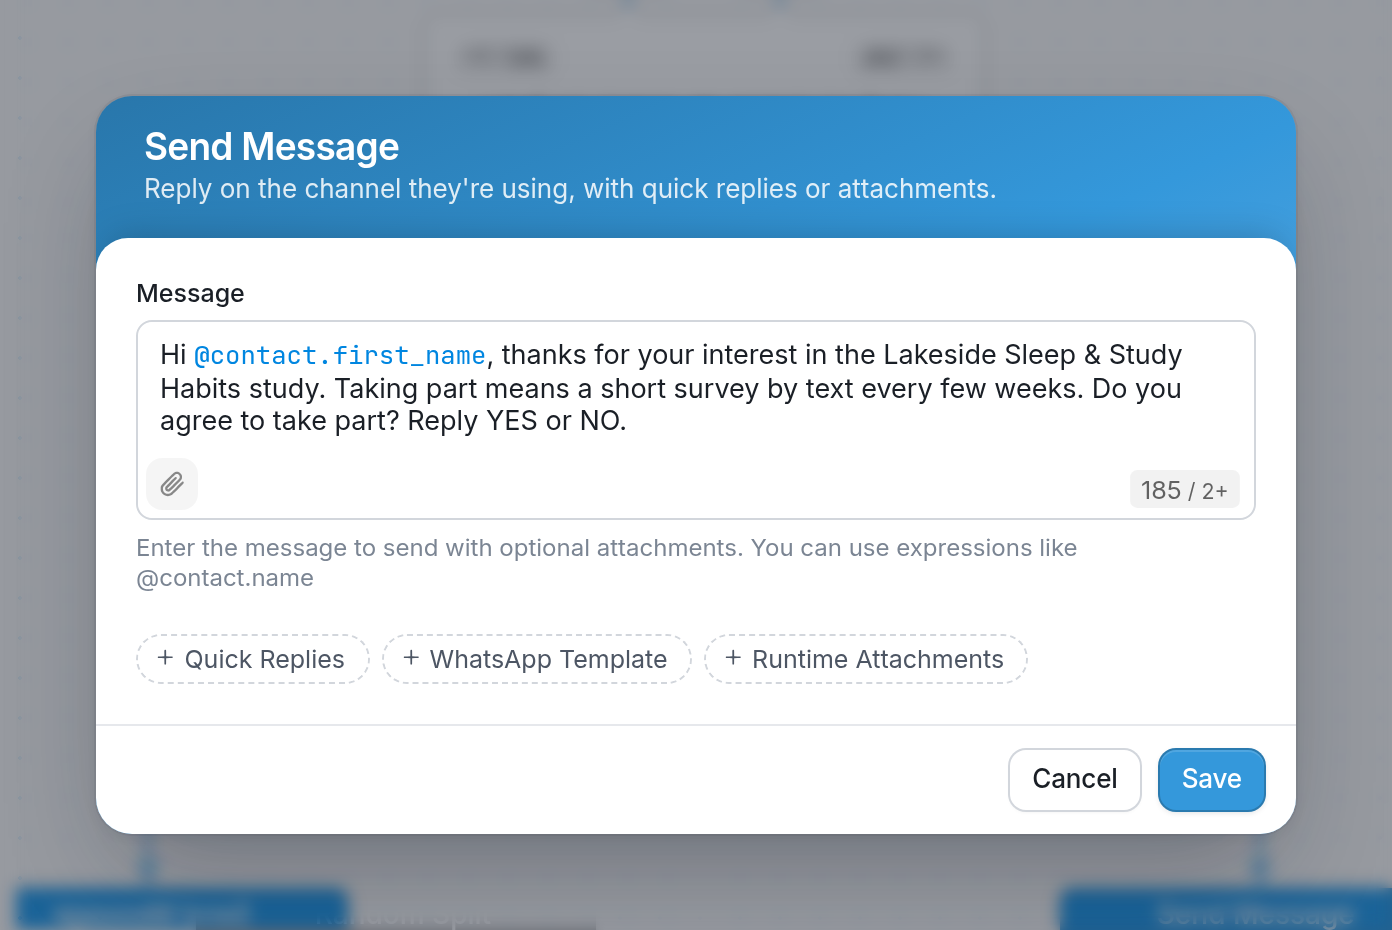
An action is a step your flow takes on your behalf. Actions are commands that let you:
-
Send a Message (sends a message and/or media attachment to active contacts who reach that node in your flow)
-
Send a Message to Someone Else (outside the interaction taking place)
-
Add and Update Contact Fields (with a value received in a response, for example)
Actions are executed immediately, in order from top to bottom:
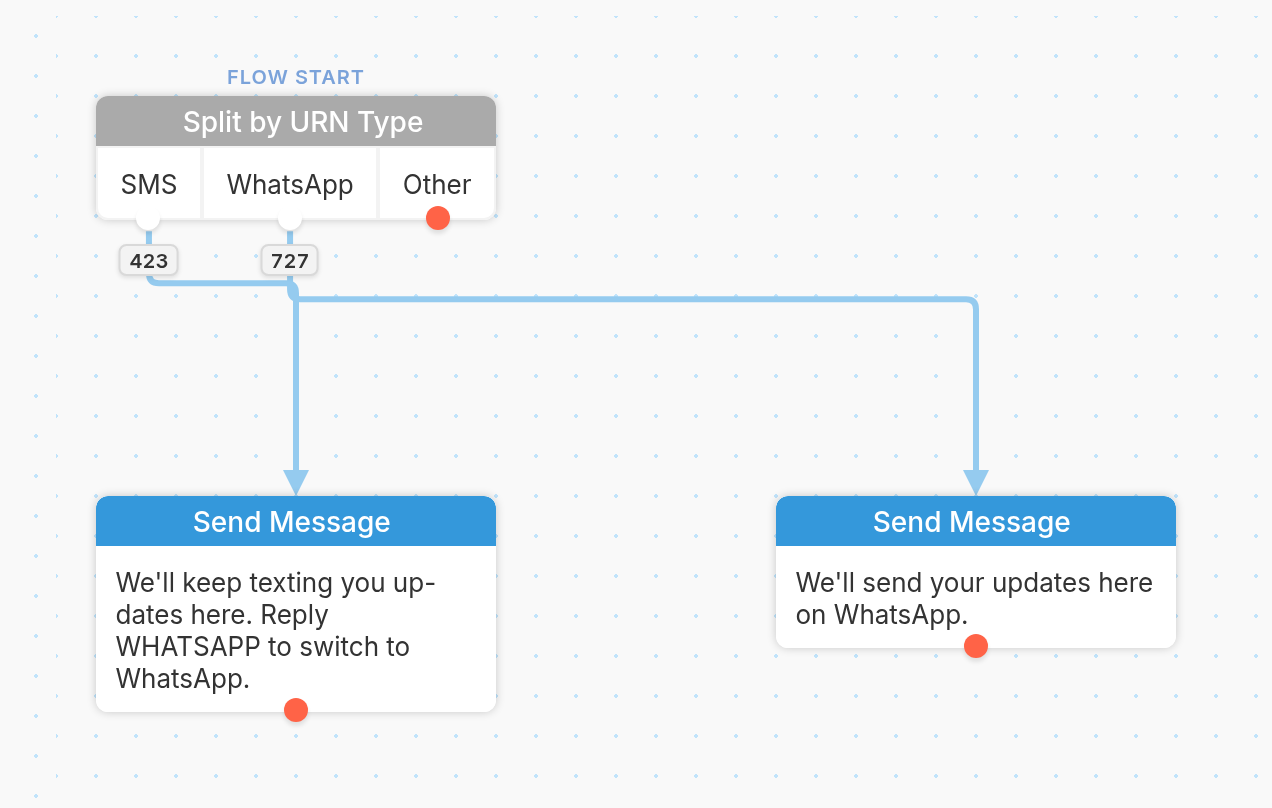
Split Actions
These are the pivot points in a flow, "splitting" it into new branches. They're conditional statements that let you direct your contacts after evaluating:
-
an incoming message or recording
-
an airtime transfer
-
the contact's activity in a subflow
-
a flow variable
-
an expression
-
random branch placement
-
the contact's group membership
Anatomy of a Wait for Response Split Action
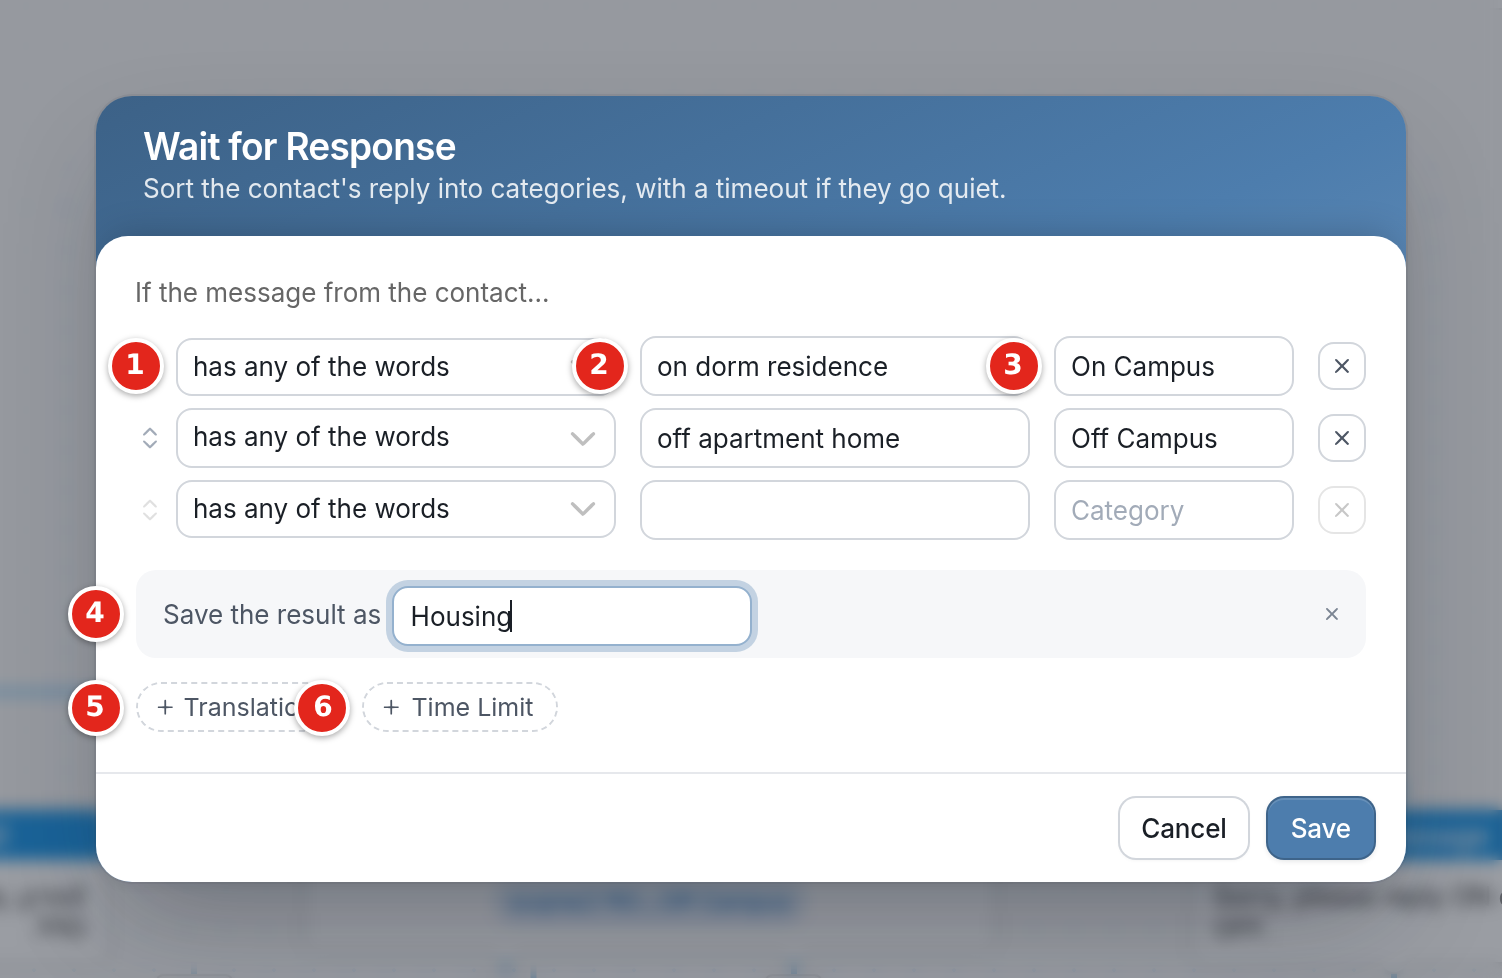
A Split Action evaluates a value, called an operand, against a set of response rules. Depending on the type of split, the operand is a variable or an expression. In the Wait for Response split pictured above, If the message from the contact... indicates that the operand is @input.text, the incoming message. The numbered parts of the split work together to build the conditional statement:
1 - The response rule that evaluates the operand. Response rules are evaluated from left to right. The first rule that matches takes effect, and no other rules are evaluated after a match.
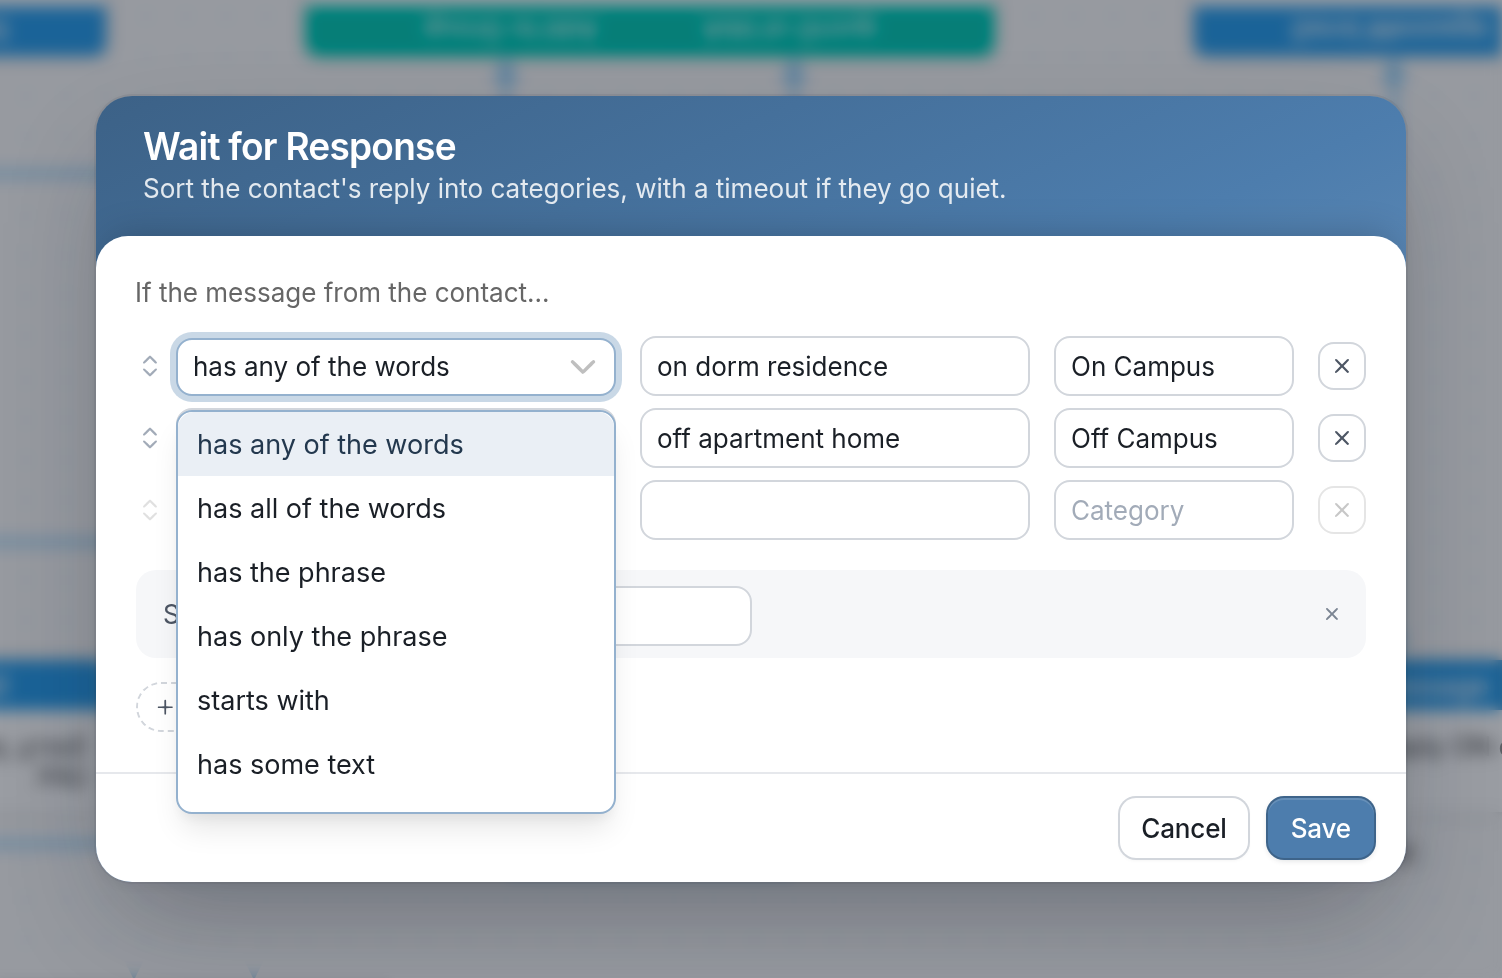
2 - The value(s) the response rule will try to match against the operand. In the example above, we've created a split that matches the words students use when they'll be living on campus. With the has any of the words response rule selected, incoming responses are placed in the "On Campus" category if they contain any of the words we've listed: "on", "dorm" or "residence". This places the response "I'll be in a dorm" in the "On Campus" category, because the word "dorm" matches. A flow will always match at least one response rule in a Split Action, because the last category is always a catch-all ("Other").
3 - The category in which contacts are placed if the operand matches the corresponding response rule. Categories are pathways from which connections can be drawn to new nodes, directing the contact onward. A contact's passage through a category is represented in the analytics tab as a response.
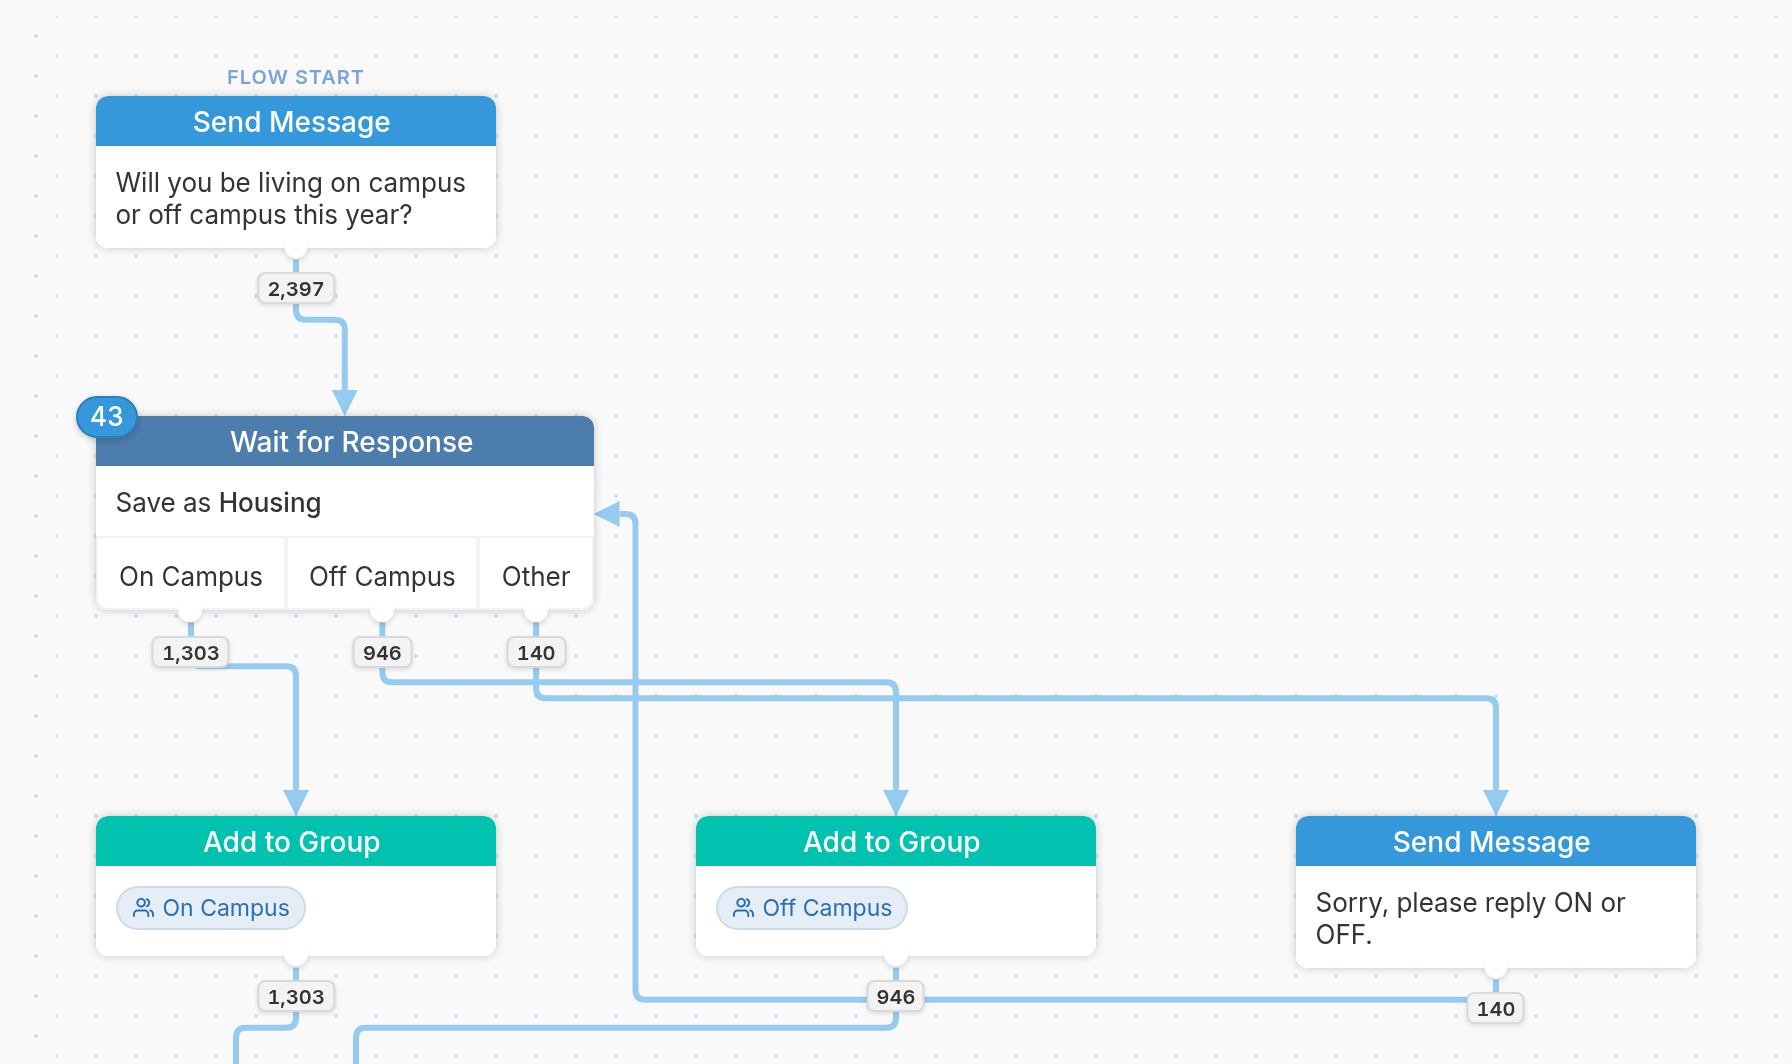
4 - The name given to the flow result created and populated by the Wait for Response split. In the example above, the result is saved as Housing, which you can reference with the flow variable @results.housing.
5 - + Translations lets you require each language to translate this split's rules, categories, or both. Use it for category translation and for referencing the translated values.

6 - + Time Limit lets you set an amount of time after which a contact is routed onward if they don't respond. If the contact hasn't responded in the time you've chosen, they're routed through a No response category. You can connect this category to a Send Message action that encourages them to continue, or leave it unconnected so they exit the flow. See more on timeouts here.
Other actions
-
Wait for Response waits for an incoming message, then evaluates it against response rules. Optionally, you can add a time limit to a Wait for Response to send a reminder message to a flow participant after a period of inactivity, or to create a pause in a flow to stagger messages.
-
Call a Webhook calls a URL, passing it the flow context, and if the external service responds in JSON, makes the response available for reference using the variable @webhook. Flow context comprises the variables available in a given flow, including the active contact's responses and contact information. This action has two categories, "Successful" and "Failed", to account for errors returned by the external service.
-
Call Zapier lets you add a flow event at any node in a flow that corresponds with a Zapier flow event trigger. Once a contact reaches a flow event, all of their responses up to that node are sent to Zapier, which can be configured to send that data to over 500 other apps without writing code. Use this guide to get started with Zapier.
-
Enter a Flow lets you start the active contact in a "child" flow at any step, then return them to the original "parent" flow. It adds two categories, Completed and Expired, so you can branch the active contact based on their activity in the child flow. Variables captured in the calling (parent) flow can be referenced using the @parent.[field] format, while variables captured in the child flow can be referenced using the @child.[field] format. More on flow variables here.
-
Split by contact field runs response rules against a value stored in a contact field (Name, Phone, etc.), referenced using the variable @contact.[variable-name], e.g.
@contact.state. -
Split by expression runs response rules against the result of an expression, such as @(REMOVE_FIRST_WORD(input.text)), which includes a function that removes the first word from the last message received, represented by the @input.text variable. Expressions can include a single variable, a single function, or a combination of variables and functions.
-
Split by flow result runs response rules against a value separated by a delimiter (a space, plus sign, or period), e.g. 1+2+3+4+5 (+ is the delimiter, 1 is the first value, 2 is the second value, 3 is the third value, and so on). See this guide for more information.
-
Split randomly lets you create as many evenly distributed buckets as you like, for randomly branching contacts in an A/B test or similar. See this guide for more information on A/B testing.
Flow Membership
Flows are states that your contacts enter and exit. Once a contact enters a flow, they're an active member of that flow until they exit. Passage through a flow from entrance to exit, and all the activity that takes place in between, makes up a run. Runs and their activity are displayed in flow results. Flow runs can be listed and started externally via the Flow Run API endpoint.
Active members are shown by the blue count at the top left corner of a node:
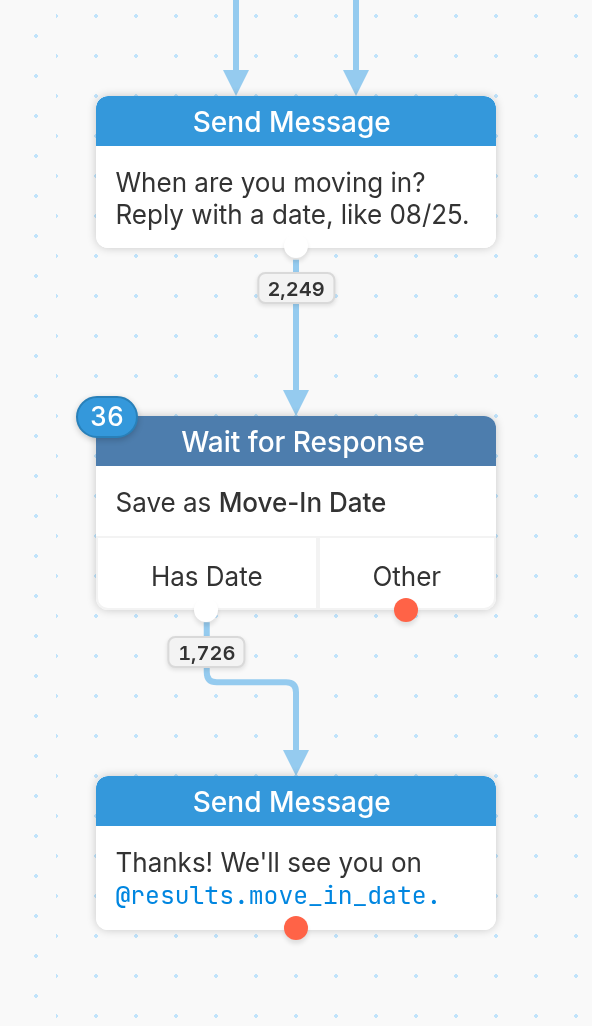
You can click the count to send them a follow-up message.
Entering a Flow
Contacts can enter flows in any of the following ways:
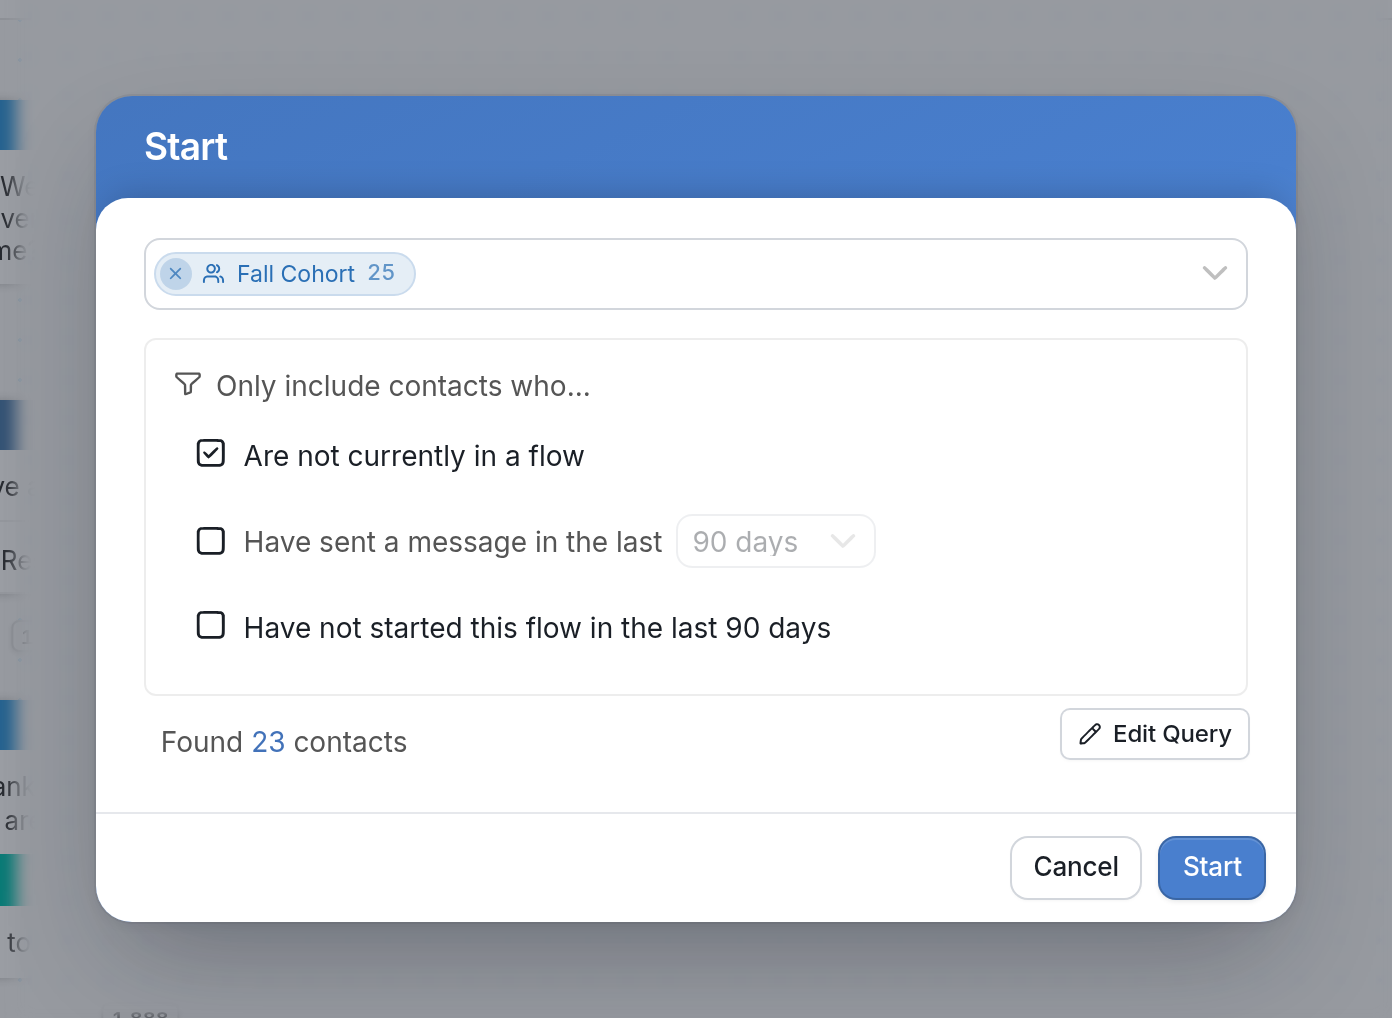
- You place them in a flow using the Start button in the flow editor. You can check Have not started in this flow in the last 90 days to send only to contacts who haven't received a message from your flow. You can also check Are not currently in a flow to avoid interrupting contacts who are active in other flows. If you interrupt a contact and remove them from another flow, they won't re-enter that flow. To target only active contacts, use Have sent a message in the last 90 days; you can adjust that period as you see fit.
-
They're placed in a flow triggered by a campaign event
-
They trigger a flow by sending a keyword
-
A contact triggers a flow by calling your channel's phone number
-
A flow is triggered by a missed call from a contact
-
A contact triggers a flow by sending a message to your channel that isn't handled elsewhere
Exiting a Flow
Contacts exit flows when:
-
They complete a flow by passing through the final node
-
They pass through an unconnected node
-
They pass through an Enter a Flow action
-
They're expired from a flow after a period of inactivity, set with Expire inactive contacts in the Edit Flow dialog, which you open from the ☰ menu in the flow editor:
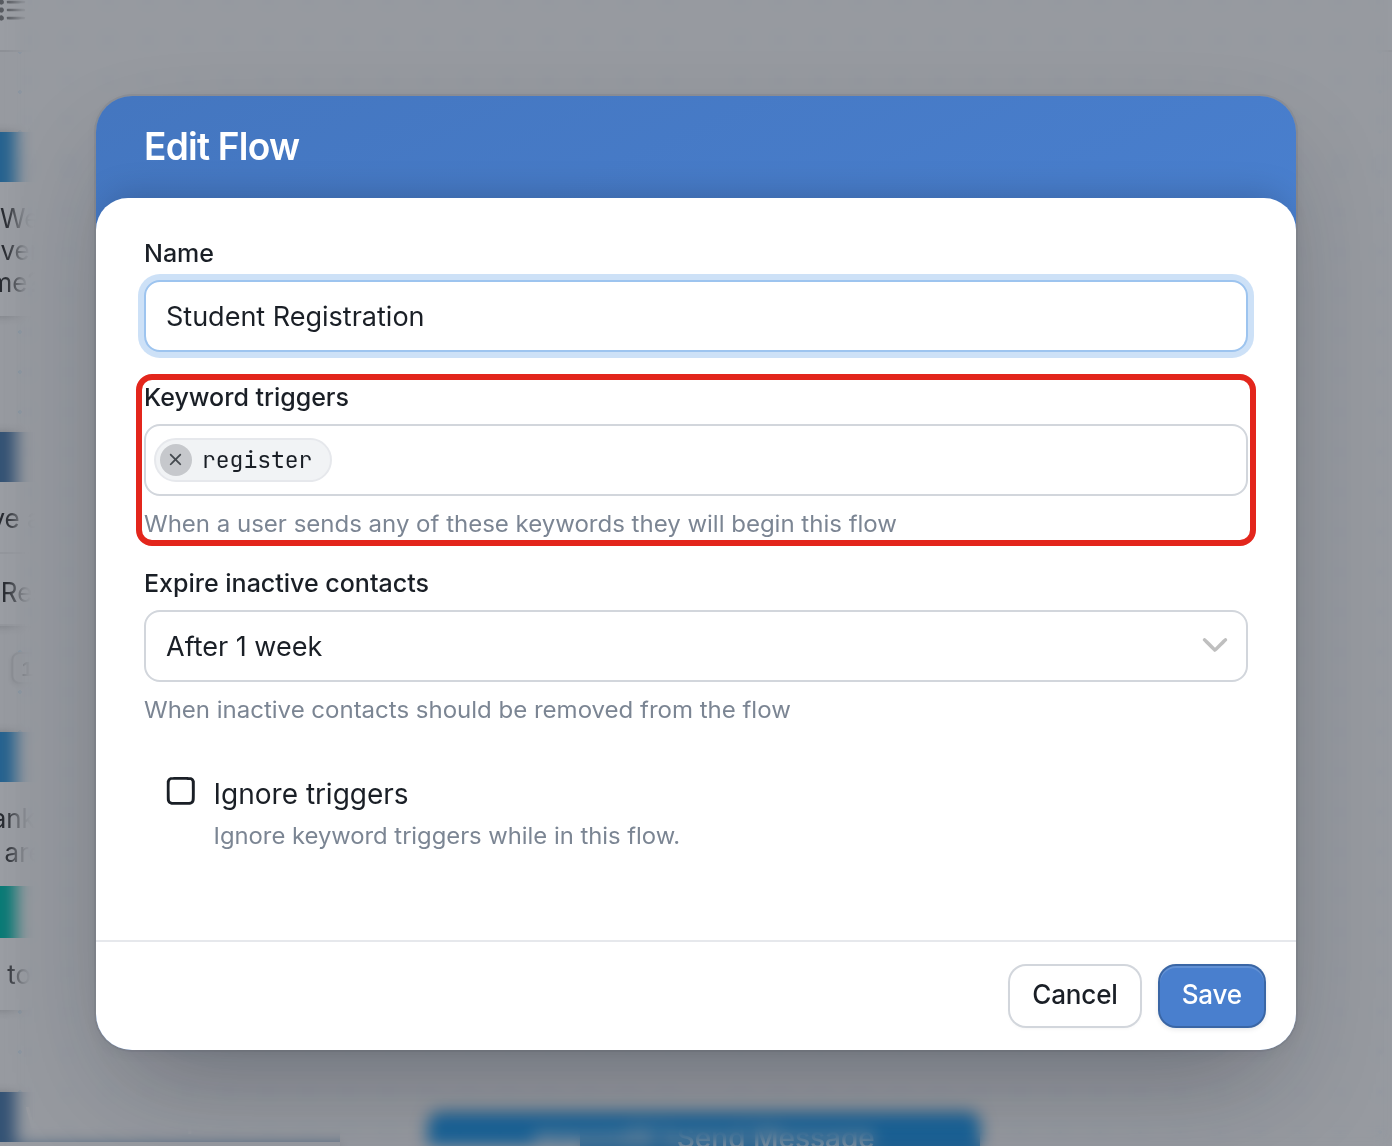
A newly created flow expires inactive contacts after 3 days by default, but you can change that period in the drop-down.
Flow Membership Rules
Contacts can only interact with one flow at a time. While a contact is active in a flow, their responses are handled only by that flow until they exit or the run expires.
Deleting a flow
You can't permanently delete a flow from your workspace. See more on that here.